Measure the midpoint of your bare upper arm, choose a validated upper-arm monitor whose cuff range includes that circumference, and place the cuff with its lower edge about 2.5 cm above the elbow crease. Sit quietly for five minutes, support your back and arm, keep both feet flat, and avoid talking or moving during the reading.
Accurate blood pressure measurement depends on both the correct cuff size and consistent technique. A cuff that does not fit the measured arm circumference can distort the result before the monitor begins its calculation. Position, rest, recent caffeine or exercise, talking, and clothing under the cuff can also affect the reading.
This guide explains how to measure your arm, put on an upper-arm blood pressure cuff, avoid common mistakes, interpret the displayed numbers, and choose between reusable and single-patient-use clinical cuffs. Home readings support—not replace—diagnosis and treatment decisions made with a qualified health professional.
Blood pressure cuff size chart
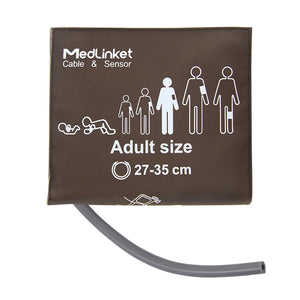
Use the cuff range printed on the product or specified by the monitor manufacturer. The ranges below are a quick orientation based on the article’s original chart; exact labels and boundaries differ among devices, so the selected monitor and cuff instructions take precedence.
| Cuff label | Example arm circumference | Typical use |
|---|---|---|
| Small adult | Up to about 26 cm | Smaller adult upper arms |
| Standard adult | About 26–34 cm | Many average adult upper arms |
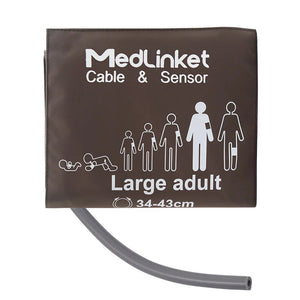
| Large adult | About 34–44 cm | Larger adult upper arms |
| Extra large / thigh | Above about 44 cm | Very large upper arms when supported by the device |


How to measure your arm for the correct cuff
Find the midpoint
Locate the midpoint between the shoulder and the point of the elbow on the upper arm.
Measure circumference
Wrap a flexible metric tape around the bare arm. Keep it level and snug without compressing the skin.
Match the printed range
Select a compatible cuff whose stated circumference range includes the measured value.
The American Heart Association recommends choosing an automatic, validated upper-arm monitor and making sure the cuff fits the measured arm. A “universal” cuff does not fit every person. For a home device, check a recognized validated-device list and bring the monitor to a clinical appointment so its use and cuff fit can be reviewed.
How to put on an upper-arm blood pressure cuff
- Use a bare upper arm. Remove tight or bulky clothing rather than rolling it into a constricting band.
- Wrap the cuff around the upper arm. Place the lower edge about 2.5 cm above the elbow crease unless the product instructions specify otherwise.
- Align the artery marker. Position the cuff’s artery mark or tubing as directed over the brachial-artery area on the inner arm.
- Fasten it evenly. The cuff should be secure and smooth, not loose, twisted, or painfully tight before inflation.
- Support the arm. Rest the arm on a table or cushion so the middle of the cuff is near heart level and the muscles can relax.
- Keep still and quiet. Do not talk, text, move the arm, or tense the hand while the device is measuring.
Prepare correctly before taking a reading
Correct application cannot compensate for poor preparation. Use the same routine whenever possible:
Reusable and single-patient-use blood pressure cuffs
| Cuff type | Best suited to | Operational requirements |
|---|---|---|
| Reusable cuff | Repeated use when the product is intended for reuse | Validated cleaning and disinfection, drying, inspection, correct storage, and removal from service when damaged |
| Single-patient-use cuff | One assigned patient during a care episode, according to labeling | Correct size, patient identification, packaging and expiry checks, and disposal according to policy |
| Disposable cuff | Use according to the exact product labeling and facility policy | Do not clean or reuse a product labeled for single use; maintain adequate size and connector inventory |
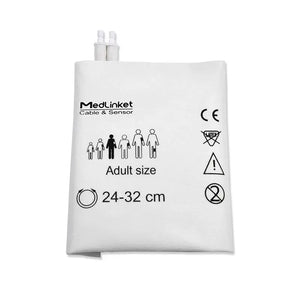
Reusable cuffs can support routine workflows when cleaning and inspection are performed correctly. Single-patient-use cuffs can simplify selected infection-control workflows, especially when a cuff is assigned to one patient for the duration allowed by its labeling. Neither category is automatically appropriate for every department or patient.
Common blood pressure cuff mistakes
Cuff-size error direction A cuff that is too small can produce a falsely high result, while a cuff that is too large can produce a falsely low result. Recheck the measured circumference and the device-approved cuff range whenever a value seems inconsistent.
Understanding blood pressure readings
The monitor displays systolic pressure—the pressure when the heart contracts—and diastolic pressure—the pressure between beats. The table below summarizes common U.S. adult categories. Diagnosis depends on repeated measurements, clinical context, and the guideline used by your health professional.
| Category | Systolic pressure | Diastolic pressure |
|---|---|---|
| Normal | Less than 120 mmHg | Less than 80 mmHg |
| Elevated | 120–129 mmHg | Less than 80 mmHg |
| High blood pressure | 130 mmHg or higher | 80 mmHg or higher |
Use an official blood-pressure resource or your clinician’s instructions for the complete category definitions, including how to interpret cases where the systolic and diastolic numbers fall into different categories.
Home blood pressure monitoring
Home monitoring can help reveal patterns that are not visible from a single office reading, support medication follow-up, and provide information about possible white-coat or masked hypertension. For the most useful record:
- Use a clinically validated upper-arm monitor with the correct cuff range.
- Measure at approximately the same times and under the same conditions.
- Take the number of readings recommended by your clinician or device instructions.
- Record the date, time, readings, pulse, arm used, and any relevant symptoms or medication changes.
- Bring the monitor and your log to appointments for review.
Frequently asked questions
How do I put on a blood pressure cuff correctly?
Place the cuff on a bare upper arm with its lower edge about 2.5 cm above the elbow crease. Align the artery marker as directed, fasten the cuff evenly, and support the arm so the middle of the cuff is near heart level. Sit still and do not talk during the reading.
What blood pressure cuff size do I need?
Measure the midpoint circumference of your bare upper arm with a flexible tape. Select a cuff approved for your monitor whose printed circumference range includes that measurement. Do not rely only on labels such as standard, large, or universal.
Can I put a blood pressure cuff over clothing?
No. Apply an upper-arm cuff directly to bare skin. Clothing under the cuff or a tightly rolled sleeve can affect fit, position, and the reading.
Can the same blood pressure cuff be used for different people?
A reusable cuff may be used for different patients only when its labeling permits reuse and it is cleaned, disinfected, dried, inspected, and stored according to the instructions and facility policy. Single-patient-use and single-use cuffs must be handled according to their labeling.
When should a reusable blood pressure cuff be replaced?
Replace or remove it from service when the fabric, bladder, hook-and-loop closure, tubing, connector, seams, markings, or strain relief is damaged; when it leaks or fails performance checks; when it cannot be cleaned as required; or when the instructions or facility policy require replacement. A universal calendar interval does not apply to every cuff.
How accurate are home blood pressure monitors?
Accuracy depends on using a clinically validated device, the correct cuff, proper technique, and a suitable patient population. Choose a validated upper-arm monitor, follow its instructions, and periodically compare your technique and device with a health professional rather than assuming every home monitor has the same accuracy.
This article provides general educational and product-selection information and is not medical advice, diagnosis, or a substitute for a clinician’s instructions. Follow the exact monitor and cuff instructions, local clinical policies, and applicable guidelines. Product availability, specifications, connector designs, package quantities, registrations, and compatibility can vary by model and market. Third-party brand names identify compatibility only and do not imply OEM manufacture, authorization, affiliation, or endorsement.