Quick Answer: When a patient monitor won't turn on, check systematically: (1) verify the wall outlet is live, (2) inspect the power cord for damage, (3) check the battery status, (4) inspect the fuse if user-accessible, (5) perform a full power reset (unplug + remove battery + wait 30 seconds). If none of these steps restore function, the internal power supply board is likely faulty—contact Biomed immediately.
📚 This article is part of the Hospital Monitor Reading & Accessories Guide series.
Related: Display Problems (Blank, Flickering, Frozen) · Monitor Shows No Reading · When to Call Biomed
You are in the middle of a shift, a patient needs continuous monitoring, and the patient monitor screen stays black. No indicator lights. No alarm tones. Nothing. It happens more often than you would expect—and the cause is usually far simpler than a catastrophic hardware failure.
This guide walks you through a systematic troubleshooting process that clinical staff and biomedical technicians can follow to diagnose and resolve the most common reasons a hospital monitor refuses to power on. We developed this checklist based on over two decades of experience manufacturing and supporting patient monitor accessories for hospitals in 120+ countries.
Estimated Fix Time: 2–15 minutes | Difficulty: Beginner | Tools Needed: None (basic checks) | When to Escalate: After Step 5 fails
Why Patient Monitors Fail to Power On: Root Causes at a Glance
Over 60% of "dead monitor" situations are caused by simple power supply issues—not internal hardware failures. Based on clinical engineering reports and MedLinket's own field service data from supporting 2,000+ hospitals globally, power-on failures typically fall into five categories:
| Failure Category | Estimated Frequency | Can Nurse/RT Fix? | Requires Biomed? |
|---|---|---|---|
| AC power supply issue (outlet, cord, connection) | ~35% | ✅ Yes | No |
| Battery failure or depletion | ~25% | ✅ Yes (basic check) | For replacement |
| Blown fuse | ~15% | ⚠️ Some models | Often yes |
| Internal power board failure | ~15% | ❌ No | ✅ Required |
| Software/firmware crash | ~10% | ✅ Power reset | If reset fails |
Roughly 60–75% of power-on issues can be identified—and often resolved—by clinical staff using the basic troubleshooting steps below, without waiting for a biomedical technician. That translates directly to time saved and patient safety preserved.
Step-by-Step Troubleshooting: 5 Checks When Your Monitor Won't Power On
Follow these steps in order. Each step rules out the most common cause before moving to the next.
Step 1: Verify the AC Power Source
What to do: Before touching the monitor, confirm the wall outlet is working. Plug a different device (phone charger, lamp, or another piece of equipment) into the same outlet.
Why it matters: A tripped circuit breaker or a deactivated outlet (common in renovated rooms) accounts for a surprising number of "dead monitor" calls. As one experienced BMET shared on the r/BMET subreddit: "Reseating a loose power cable was the fix in an ICU—total repair time was 8 seconds."

Common mistakes to avoid:
❌ Assuming the outlet works because "it was working yesterday"—breakers can trip overnight due to electrical surges.
❌ Only checking the power button without verifying the outlet—always start from the wall.
💡 Pro Tip: Some hospital rooms have red-colored "emergency" outlets that remain powered even during outages. If available, try plugging the monitor into the emergency outlet to test.
Step 2: Inspect the Power Cord and Connections
What to do: Unplug the power cord from both the wall and the monitor. Inspect the entire length for visible damage: fraying, cracks, bent pins, kinks, or discoloration. Reconnect firmly at both ends, ensuring a snug fit.
Why it matters: Power cords endure constant stress from rolling carts, foot traffic, and equipment stacking. Internal wire breaks may not be visible externally. Damaged cables are one of the most common—and most overlooked—causes of power-on failures in medical monitors.
⚠️ Safety Warning: If you see burn marks, melting, or smell anything burning on the cord or the monitor's power input, do NOT attempt to plug it in. Remove it from service immediately and contact Biomed. This is an electrical safety hazard.

If the cord appears damaged, try a known-good replacement cord with the same specifications. Quality replacement medical cables must match the original specifications for voltage rating, connector type, and safety certification. Using incompatible cables can damage the power supply board or create safety risks. If you're sourcing a non-OEM replacement, it helps to first understand what "compatible" actually means for a replacement cable beyond a connector that simply plugs in.
Step 3: Check the Battery Status
What to do: If the monitor has an internal battery (most bedside monitors do), plug it into a confirmed working AC outlet and wait 30 seconds. Look for any battery or charging indicator—even a faint LED. Then try powering on.
Why it matters: When a battery is completely depleted, some monitors require a minimum charging threshold before they can boot up. This can take 2 to 10 minutes of passive charging before the power button becomes responsive.

Signs of a dead or failing battery:
| Symptom | What It Indicates |
|---|---|
| Monitor only works when plugged into AC—shuts off immediately when unplugged | Battery cannot hold charge |
| Battery indicator shows 0% or does not display at all | Battery fully depleted or controller fault |
| "Low battery" alarm sounds even after 8+ hours of charging | Battery cells degraded beyond recovery |
| Progressively shorter battery runtime over recent months | Normal aging (expect 2–4 years lifespan) |
Most patient monitor batteries last 2–4 years under regular use. A dead battery still needs replacement even if AC-powered operation works fine—because during patient transport or a power outage, a dead battery means a dead monitor.
💡 Pro Tip: Monitors that sit unused for weeks with a depleted battery often develop deep-discharge issues that permanently reduce capacity. Maintain a battery charging schedule—charge to approximately 50% and check monthly when devices are in storage.
Step 4: Check the Fuse (If Accessible)
What to do: Some patient monitors have a user-accessible fuse compartment, typically located near the AC power input on the rear panel. If your monitor has one (check the user manual), unplug the monitor, open the fuse compartment, and visually inspect the fuse. A blown fuse will show a broken filament or dark discoloration inside the glass tube.
Why it matters: Power surges, even brief ones, can blow a monitor's protective fuse. This is by design—the fuse protects more expensive internal components from damage. A blown fuse with a replaceable design is a fast, low-cost fix.

Common mistakes:
❌ Replacing a fuse with one of a different amperage rating—this creates a fire hazard and can damage internal components.
❌ Replacing the fuse without investigating why it blew—repeated fuse failures indicate a deeper issue (surge, short circuit) that requires Biomed investigation.
🛑 Safety Warning: Not all monitors have user-serviceable fuses. If the fuse is inside the monitor casing (requires opening the housing), STOP. Do not open the monitor. This requires Biomed or qualified service personnel. Opening the casing exposes you to electrical hazards and voids the warranty.
Step 5: Perform a Full Power Reset
What to do: Disconnect the monitor from AC power. If the battery is removable, remove it. Wait a full 30 seconds (this allows internal capacitors to fully discharge). Reinsert the battery, reconnect AC power, and press the power button.
Why it matters: A hard power reset resolves firmware lock-ups and boot-loop issues that can make a monitor appear completely dead. This is the electronic equivalent of a "brain reboot." Monitors are complex computers—and like any computer, they can occasionally freeze during the boot process in a way that makes them appear to have no power at all.
Critical detail: Wait the full 30 seconds. Rushed resets (5–10 seconds) may not fully discharge the capacitors, and the same frozen state may persist.
After a power reset, verify that alarm settings, patient data, and parameter configurations are correct before resuming patient monitoring. For more information on proper alarm configuration, see False Alarms on Patient Monitors: Prevention Strategies.
Decision Flowchart: Power-On Troubleshooting at a Glance
| Step | Check | If NO | If YES → Next |
|---|---|---|---|
| 1 | Is the wall outlet working? | Try a different outlet or reset the breaker | → Step 2 |
| 2 | Is the power cord intact and firmly connected? | Replace with known-good cord of same spec | → Step 3 |
| 3 | Is the battery charged? (Any LED activity?) | Plug in AC, wait 5–10 min, then retry | → Step 4 |
| 4 | Is the fuse intact? (If user-accessible) | Replace fuse (same rating only) | → Step 5 |
| 5 | Perform full power reset (unplug + remove battery + 30 sec wait) | Still dead → Call Biomed | ✅ Resume monitoring, verify settings |
When to Call Biomed: Issues Beyond Basic Troubleshooting
Not every problem can—or should—be solved at the bedside. Contact your Biomedical Engineering department immediately for any of these symptoms:
| Symptom | Likely Cause | Why Biomed Is Needed |
|---|---|---|
| Burning smell or visible burn marks | Power board component failure | Electrical safety hazard; fire risk |
| Monitor powers on then immediately shuts off (repeating cycle) | Power supply board malfunction or capacitor failure | Internal diagnostics required |
| Indicator light on, but screen completely black | Display board or backlight failure | See Display Problems guide for details |
| White screen or garbled display on power-up | Main control board failure | Board-level diagnosis needed |
| Error codes on boot not in user manual | Internal component or firmware failure | OEM-specific diagnostics required |
| Fuse blows again immediately after replacement | Internal short circuit | Component-level fault finding required |
For a comprehensive decision framework covering all monitor troubleshooting scenarios—power, display, alarms, and parameter issues—see our dedicated guide: When to Call Biomed vs. Troubleshoot Yourself.
💡 Tip for Biomed Communication: When calling Biomed, provide: the monitor brand and model number, the equipment asset/serial number, what you observed (lights, sounds, screen behavior), and what steps you already tried. Hospitals with detailed equipment logs resolve patient monitor issues significantly faster.
Prevention: How to Avoid "Monitor Won't Turn On" Situations
The best troubleshooting is the kind you never have to do. These preventive practices significantly reduce the chance of encountering a dead monitor during a critical moment.
1. Follow a Preventive Maintenance (PM) Schedule. Most manufacturers recommend formal PM at least once per year. High-acuity environments (ICU, operating rooms, emergency departments) benefit from PM every 6 months. A comprehensive PM includes power supply testing, battery health verification, display calibration, alarm testing, and full inspection of all monitoring accessories including ECG cables, SpO2 sensors, and NIBP cuffs.
2. Inspect Cables Regularly. Power cords, ECG trunk cables, and SpO2 adapter cables all endure physical stress during daily use. A quick visual inspection at the start of each shift can catch frayed wires, loose connectors, and worn insulation before they cause a problem. Follow a structured accessory replacement schedule to stay ahead of wear-related failures.
3. Manage Batteries Properly. Avoid leaving monitors with fully depleted batteries for extended periods. Establish a rotation schedule for portable monitors so batteries stay conditioned. Replace batteries that no longer hold more than 80% of their rated capacity.
4. Protect Against Power Surges. Use hospital-grade surge protectors on non-emergency outlets. Power surges are a leading cause of blown fuses and damaged power boards, especially in regions with unstable electrical infrastructure.
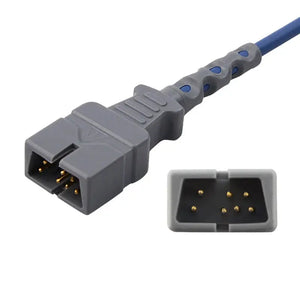
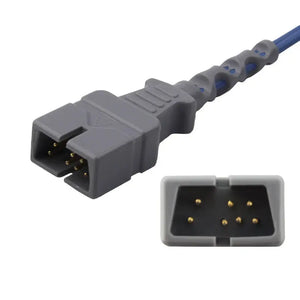
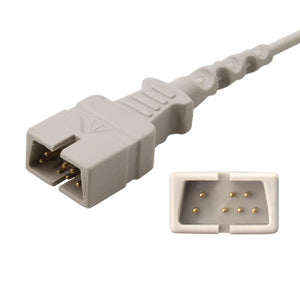
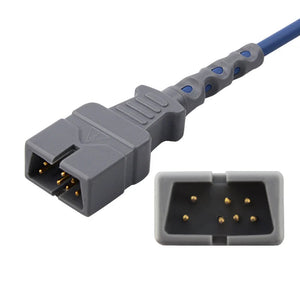
5. Use Quality, Compatible Accessories. Poor-quality or incompatible accessories do not just cause measurement errors—in rare cases, electrical incompatibilities can stress the monitor's internal power system. Always verify that monitoring accessories meet the required specifications for your specific monitor brand and model. Use the 5-step cable identification method to ensure correct matching, and see how connector fit and pinout are verified before a part ships, since a marginal connection can stress the front-end electronics. Look for accessories backed by FDA 510(k) clearance, CE marking, and ISO 13485 quality management certification — here's what FDA 510(k), ISO 13485 and liability coverage actually mean when you're vetting a supplier.

Accessory Issues That Mimic a "Dead" Monitor
Sometimes the monitor is actually on, but a peripheral issue makes it appear non-functional. Before concluding that the monitor has failed, rule out these accessory-related scenarios:
| What You See | Possible Accessory Cause | How to Check |
|---|---|---|
| Screen on but completely black (no parameters visible) | Brightness accidentally set to minimum | Press brightness-up button or check display settings. See Display Problems guide. |
| Monitor on but shows no waveforms or values | No patient monitor accessories connected | Connect at least one sensor/cable. See No Reading Troubleshooting. |
| "Leads Off" alarm immediately on power-on | ECG electrodes not connected or ECG cables disconnected | Check all electrode connections. See ECG Leads Off Alarm Fix. |
| Monitor powers on but no SpO2 reading | SpO2 sensor disconnected, damaged, or incompatible | Reconnect or replace. See OEM vs. Compatible Accessories. |
| Blood pressure alarm on power-on but no actual cuff connected | NIBP cuff or hose disconnected | Check cuff connection at both the hose and monitor port. |
For a complete guide to identifying and matching the right cables for your monitor, see How to Identify Which Cables Your Monitor Needs (5-Step Method). If the missing reading is on SpO2 specifically and you're using a cross-brand sensor, our lab write-up on cross-brand SpO2 sensor compatibility we bench-tested shows which sensor/monitor combinations actually hold a clean signal.

Quick Reference: Troubleshooting Checklist
Print this checklist and keep it near your monitoring station for fast reference.
| ☐ | Check Item |
|---|---|
| ☐ | Wall outlet confirmed working (tested with another device) |
| ☐ | Power cord inspected—no fraying, cracks, bent pins, or kinks |
| ☐ | Power cord firmly connected at both ends (wall and monitor) |
| ☐ | Battery indicator checked—any LED activity? |
| ☐ | If battery depleted: plugged into AC for 5–10 minutes before retrying |
| ☐ | Fuse inspected (if user-accessible)—no broken filament or discoloration |
| ☐ | Full power reset performed (AC disconnected + battery removed + 30 sec wait) |
| ☐ | If still dead: Biomed contacted with brand, model, serial number, and steps attempted |
| ☐ | Backup monitor deployed if available |
| ☐ | Issue documented in equipment log |
Frequently Asked Questions
Q: Why is my patient monitor not turning on even when plugged in?
If a patient monitor will not power on despite being plugged in, check three things in order: verify the wall outlet is live by testing with another device, inspect the power cord for visible damage, and check whether the monitor's internal fuse has blown. A blown fuse is one of the most overlooked causes. If none of these resolve the issue, the internal power supply board may be faulty—contact your Biomedical Engineering department.
Q: How do I know if my patient monitor battery is dead?
Signs of a dead or failing battery include: the monitor only works when plugged into AC power, the battery indicator shows 0% or does not appear, the monitor shuts down immediately after unplugging, or a "low battery" alarm sounds even after 8+ hours of charging. Most patient monitor batteries last 2–4 years with regular use.
Q: Can a damaged power cord prevent a patient monitor from turning on?
Yes. Damaged power cords are a common and frequently overlooked cause. Look for fraying, cracks, bent or corroded pins, or kinks near connector ends. Even internal wire breaks invisible from outside can prevent power delivery. Test with a known-good cord of the same specification to confirm.
Q: What is the difference between a blank screen and a monitor that won't turn on?
A monitor that truly won't power on shows no signs of life—no LEDs, no sounds, no response to the power button. A blank screen where LEDs are on but the screen is dark is a display problem, not a power problem. For blank screens with LEDs on, see our Monitor Display Problems: Blank, Flickering, Frozen guide. For no readings on individual parameters while the screen works, see Patient Monitor Shows No Reading.
Q: When should I call Biomedical Engineering instead of troubleshooting myself?
Call Biomed immediately if the monitor emits a burning smell or shows burn marks, powers on and immediately shuts off in a cycle, shows error codes not in the user manual, or if fuses blow repeatedly. Never attempt to open the monitor casing yourself. For a detailed decision framework, see When to Call Biomed vs. Troubleshoot Yourself.
Q: How often should patient monitors receive preventive maintenance?
Most manufacturers recommend PM at least once per year. High-use environments like ICUs and operating rooms may need PM every 6 months. PM should include power supply testing, battery health checks, display calibration, alarm verification, and inspection of all monitoring accessories—ECG cables, SpO2 sensors, NIBP cuffs, temperature probes, and all connecting hardware. See our Accessory Replacement Schedule for specific timelines.
Related Products: Quality Replacement Accessories
When troubleshooting reveals a cable, sensor, or accessory needs replacement, quality matters. Incompatible or substandard accessories can contribute to equipment stress and failure. MedLinket offers FDA-cleared, CE-marked compatible accessories for all major patient monitor brands.
| Accessory Type | Common Need | Available Options |
|---|---|---|
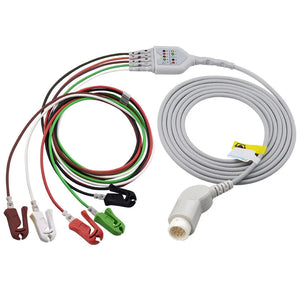
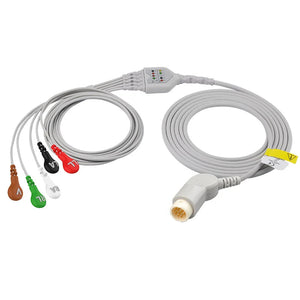
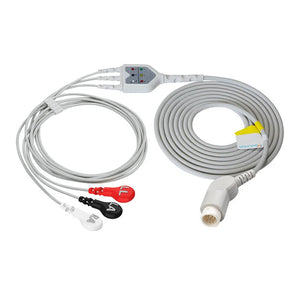
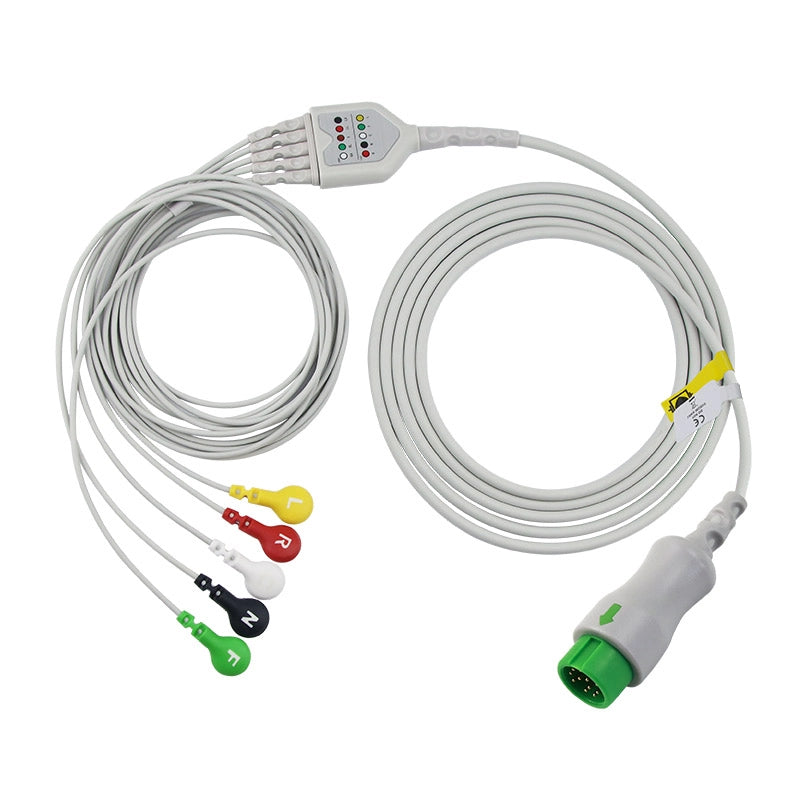
| ECG Cables & Leadwires | "Leads Off" alarms, no ECG waveform | Mindray 3-Lead · Mindray 5-Lead · Philips Leadwires |
| SpO2 Sensors | No SpO2 reading, false low alarms | Mindray Adult · Comen Adult · Biolight Adult |
| NIBP Cuffs | BP alarm failures, air leaks | Reusable Cuffs · Disposable Cuffs |
| Temperature Probes | No temperature reading | Reusable Probes · Disposable Probes |
| EtCO2 Accessories | No EtCO2 waveform | Sampling Lines · Water Traps |
🎯 Keep These ECG Replacements On Hand
The consumables and cable most often behind a "Leads Off" alarm or missing waveform — the issues that make a working monitor look dead
About MedLinket — Reliable Patient Monitor Accessories Since 2004
| 🏭 Founded | 2004 · Shenzhen, China (NEEQ: 833505) |
| 🏭 Manufacturing | 3 self-owned factories (Shenzhen, Shaoguan, Indonesia) · 3,500+ molds · 16,651+ SKUs |
| 📋 Certifications | ISO 13485 · FDA 510(k) (19 clearances) · CE (48 Class II) · NMPA · MDSAP |
| 🌍 Global Reach | 120+ countries · 2,000+ hospitals · 30+ compatible monitor brands |
| 🔬 Quality | 100% outgoing inspection · $5M product liability insurance · OEM partner to leading brands |
| 🛡️ Safety | Patented over-temperature protection on SpO2 sensors (auto-shutoff at 41°C) |
| 🔗 Compatibility | Philips, GE, Mindray, Dräger, Masimo, Nellcor, Nihon Kohden, and 23+ more |
Need Compatible Accessories or Troubleshooting Help?
Share your monitor brand and model—we will match the right accessories and confirm compatibility for free.
Browse SpO2 Sensors →Browse ECG Cables →
📧 shopify@medlinket.com · 💬 WhatsApp: +852 6467 3105
Disclaimer: This article is for educational purposes and does not constitute medical device service advice. Always follow your facility's clinical engineering protocols and the monitor manufacturer's service guidelines. Hardware repairs should only be performed by qualified biomedical equipment technicians.