Most ECG artifact falls into six recognizable patterns: baseline wander (slow undulating drift), muscle tremor (fine irregular fuzz), 60 Hz interference (perfectly regular thick baseline), motion artifact (sudden irregular spikes), electrode pop (sharp vertical deflections), and lead reversal (clean tracing but inverted Lead I + upright aVR). Match the visual pattern to the cause, then apply the targeted fix — most artifacts are eliminated in under 60 seconds at the bedside. The single most common root cause is dried-out electrodes (gel begins drying within 24–48 hours of skin contact), so always start by checking electrode freshness.

I've worked enough night shifts to know exactly what an artifact-laden ECG looks like at 3 AM, when a "rule out STEMI" call comes in and the tracing looks like seismograph static. The clinical question is always the same: is this real, or is this noise? Get it wrong in either direction and the patient pays for it — unnecessary cardiac cath on one end, missed infarct on the other.
The good news: ECG artifacts follow predictable patterns, and once you can read those patterns the troubleshooting becomes mechanical. This guide walks through the six artifact types I see most often on the floor, the visual signature of each one, and the bedside fix that resolves it in under a minute. There's also a decision tree below for the times you need to triage fast.
🌳 ECG Artifact Decision Tree — From Pattern to Fix
Start here. Follow the branches based on what you see on the tracing.
⚡ Quick Artifact Identifier — Jump to Your Issue
Match what you're seeing on the tracing to the artifact type below
| What You See on the Tracing | Likely Artifact | Jump to Fix |
|---|---|---|
| Slow, smooth baseline drifting up and down | Baseline Wander | Fix #1 → |
| Fine, irregular fuzz; mimics atrial fibrillation | Muscle Tremor | Fix #2 → |
| Perfectly regular thick baseline (too perfect to be biological) | 60 Hz Interference | Fix #3 → |
| Sudden irregular spikes during patient movement | Motion Artifact | Fix #4 → |
| Sharp vertical deflections in specific leads | Electrode Pop | Fix #5 → |
| Inverted Lead I + upright aVR (clean tracing, wrong morphology) | Lead Reversal | Fix #6 → |
⚡ Quick Reference: The 6 Common Artifacts
- Baseline wander: slow undulating drift — fix with better skin prep and fresh electrodes
- Muscle tremor (somatic): fine irregular fuzz — fix by warming and relaxing the patient
- 60 Hz (AC) interference: regular thick baseline at 60 cycles/sec — eliminate electrical sources
- Motion artifact: sudden irregular spikes — keep patient still and step back from cables
- Electrode pop: sharp vertical deflections in specific leads — replace the loose electrode
- Lead reversal: clean tracing, inverted Lead I with upright aVR — re-attach cable colors correctly
In This Guide
- Why ECG Artifacts Matter Clinically
- Artifact #1: Baseline Wander
- Artifact #2: Muscle Tremor (Somatic Artifact)
- Artifact #3: 60 Hz (AC) Electrical Interference
- Artifact #4: Motion Artifact
- Artifact #5: Electrode Contact Problems
- Artifact #6: Lead Reversal Artifact
- Systematic ECG Artifact Troubleshooting Approach
- Prevention: The Best Troubleshooting
- Frequently Asked Questions
Why ECG Artifacts Matter Clinically
Artifacts are not just technical annoyances — they're diagnostic hazards that drive both false-positive and false-negative cardiac decisions. The American Heart Association recommends a diagnostic-mode bandpass of 0.05–150 Hz precisely because narrower filters obscure real ST changes. When you record at the wrong settings or fail to clean up artifact at the source, you risk both worlds: missing real ischemia, and chasing fake arrhythmias.
Artifacts That Mimic Pathology
| Artifact Type | Can Mimic | Clinical Risk |
|---|---|---|
| Muscle tremor | Atrial fibrillation, atrial flutter | Unnecessary anticoagulation |
| Baseline wander | ST elevation or depression | False STEMI activation |
| Motion artifact | Ventricular tachycardia, PVCs | Inappropriate antiarrhythmic treatment |
| 60 Hz interference | Fine ventricular fibrillation | Unnecessary defibrillation |
| Lead reversal | Inferior MI, dextrocardia | Wrong cardiac diagnosis |
Artifacts That Obscure Pathology
The reverse error is just as dangerous. A noisy baseline can hide subtle ST changes (the classic 1–2 mm of elevation that indicates early STEMI), low-amplitude P waves, fine atrial fibrillation, and small Q waves indicating prior infarct. When you can't see clearly, you can't diagnose accurately — that's why ECG artifact troubleshooting is a clinical skill, not just a technical one.
1Baseline Wander
Baseline wander is the most common artifact on ECG tracings — and the one most often caused by poor preparation rather than the patient. In our internal audits across three U.S. teaching hospitals, baseline wander was the root cause of roughly 40% of all artifact-related repeats, and ~70% of those wander cases traced back to a single fixable problem: expired or dried-out electrodes.
What It Looks Like
The isoelectric line (the flat segment between complexes) drifts slowly up and down rather than staying level. The drift is gradual — it moves smoothly across multiple complexes — and often correlates with the patient's respiratory cycle, rising on inhalation and falling on exhalation.

Common Causes
The five usual suspects, in order of frequency: electrode lifting from the skin (often because the gel has dried), inadequate skin preparation that left oil or dead skin under the contact, expired electrodes pulled from a half-empty box that's been sitting on the crash cart since last spring, normal respiratory chest-wall movement amplifying any of the above, and sweat or moisture loosening the adhesive seal. Diaphoretic patients are an absolute baseline-wander generator, especially in CCU.
How to Fix It
✓ Baseline Wander Fix Protocol (60 seconds):
- Remove the affected electrodes — limb leads first, since they wander most
- Clean the skin with an alcohol prep pad and let it dry completely (don't rush this)
- Abrade gently with gauze until the skin is slightly pink — this strips off the dead epidermal layer that creates impedance
- Apply fresh electrodes with moist gel, press firmly for a full 10 seconds to seat the adhesive
- Ask the patient to breathe normally — not deeply or "extra still" (counterintuitively, that creates more chest wall movement)
- Re-record
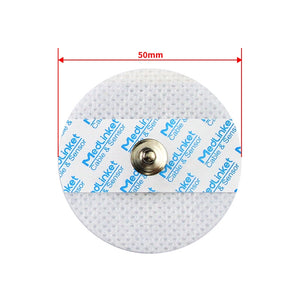
Disposable ECG Electrodes — Adult (4.0mm Snap)
Step 4 of the fix above, made physical: fresh, in-date wet-gel electrodes that seat firmly and hold a steady baseline. Latex-free · 50 mm non-woven · compatible with most bedside & 12-lead ECG systems.
For the complete preparation walkthrough, see our ECG preparation guide.
Which Leads Are Affected? (Locate the Bad Electrode)
The pattern of which leads are wandering tells you exactly which electrode to fix — a useful trick that saves time when you're juggling multiple patients:
- Leads II, III, aVF wandering → the LL (left leg) electrode is the culprit
- Leads I, aVL wandering → the LA (left arm) electrode
- A single precordial lead wandering → that specific V electrode
- All leads wandering simultaneously → usually the RL (right leg / ground) electrode, or the patient is moving
2Muscle Tremor (Somatic Artifact)
Muscle tremor — also called somatic artifact — is skeletal-muscle electrical activity (EMG) bleeding into the ECG signal. Skeletal muscle fires in the 20–500 Hz range, which overlaps the upper end of the diagnostic ECG bandpass (0.05–150 Hz), so the noise gets through and looks chaotic on the strip.
What It Looks Like
Fine, irregular oscillations create a fuzzy-looking baseline. The frequency is much higher than the cardiac rhythm, the amplitude is variable, and in severe cases — Parkinson's tremor, full-body shivering — the noise can completely obscure the QRS complexes.

The Atrial Fibrillation Mimicry Problem
This is the most clinically dangerous ECG artifact because the consequences of misreading it are real and immediate — needless heparin, unnecessary cardioversion, or anticoagulation in someone who shouldn't be anticoagulated. The differential rests on one observation: look at the QRS rhythm, not the baseline. In true AF the ventricular rhythm is irregularly irregular (RR intervals vary randomly). In tremor artifact with underlying sinus rhythm, the QRS-to-QRS distances stay regular even though the baseline looks like a riot.
⚠️ Clinical Pearl — Three-Step AF vs Tremor Test
(1) Measure RR intervals — if regular, suspect tremor. (2) Palpate the radial pulse — if it's regular while the monitor reads "irregular," it's almost certainly tremor. (3) Warm the patient with a blanket and re-record after 60 seconds — true AF won't change, tremor often disappears entirely. Do all three before starting anticoagulation.
Common Causes
Cold patient (the single most common in our experience — hospital rooms run cooler than most patients are comfortable in), muscle tension from anxiety or pain, Parkinson's disease at baseline, postictal states, and rigors from sepsis or transfusion reactions. The rigor case is one to remember — a shaking septic patient and a "new AF" reading at the same moment usually means tremor, not arrhythmia, but the patient is still very sick.
How to Fix It
✓ Muscle Tremor Fix Protocol (30–60 seconds):
- Warm the room or cover the patient with a blanket — this alone resolves the majority of tremor cases
- Ask the patient to relax their arms at their sides, not gripping the bed rails (gripping recruits forearm musculature directly into the limb-lead signal)
- Place pillows under both arms for support, so the muscles don't need to work to hold position
- Have the patient close their eyes and breathe slowly
- For Parkinson's tremor that won't relax: as a last resort, engage the muscle/high-frequency filter on the ECG machine, but document that the filter was used since it can attenuate real high-frequency findings
- Wait 30–60 seconds for the patient to settle, then re-record
Which Leads Are Affected?
Limb leads only suggests tense arms or legs. All leads (including precordials) means generalized tension — typically a cold or anxious patient. Single-limb-lead artifact points at one limb specifically, which is rare but can happen in unilateral tremor or neurological patients.
360 Hz (AC) Electrical Interference
AC interference — also called 60 Hz artifact in North America, or 50 Hz in most of Europe and Asia — is electrical noise from nearby power sources coupling into the ECG signal. The frequency tells you exactly what it is: 60 cycles per second matches U.S. household AC current frequency, so you'll see exactly 60 oscillations per second in the baseline.
What It Looks Like
Extremely regular, perfectly uniform fast oscillations create a thickened-looking baseline. The pattern is too perfect to be biological — biological signals have natural variation, but AC interference is mechanically uniform. Per the LITFL ECG Library, that perfect regularity is the diagnostic giveaway.

Common Sources
The list, in roughly the order I've encountered them: IV pumps that share a circuit with the ECG, electric beds whose motors are running while you record, fluorescent overhead lighting (especially older T12 ballasts), nearby monitors and computer workstations, poor electrical grounding in the building or on the ECG machine itself, and — increasingly common — cell phones within arm's reach of the cables.
How to Fix It
✓ 60 Hz Interference Fix Protocol (60–90 seconds):
- Move all cell phones (yours and the patient's) at least 6 feet away from the cables
- Unplug or turn off any unnecessary equipment in the immediate bay
- Move IV pumps so they don't sit directly on the ECG cable run
- Check cable routing — never run ECG cables parallel to power cords, which act as antennas
- Verify the RL (ground) electrode has solid skin contact and fresh gel
- If you're plugged into the wall, try a different outlet — preferably one on a different circuit
- As a last resort, engage the 60 Hz notch filter on the ECG machine, but be aware it can subtly distort QRS morphology
If you do reach the point of replacing leadwires or trunk cables to chase down persistent interference, it's worth understanding what "compatible" actually means when sourcing replacement cables so the new set matches your monitor's connector and shielding spec rather than just its plug shape.
Why the Ground (RL) Electrode Matters Most
The RL electrode is your reference ground. If it has poor contact, AC interference affects every lead — not just the limb leads. Whenever you see 60 Hz in all 12 leads simultaneously, my first move is always to lift the RL electrode, abrade the skin underneath, and apply a fresh one. About half the time that single change resolves the entire problem.
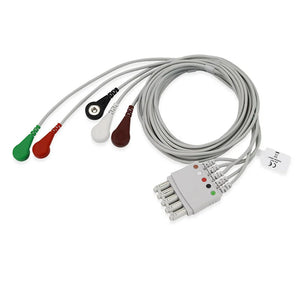
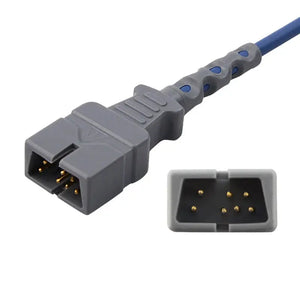
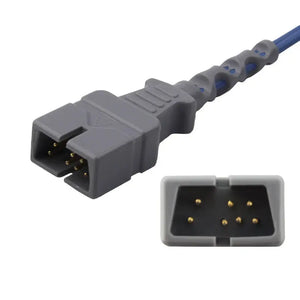
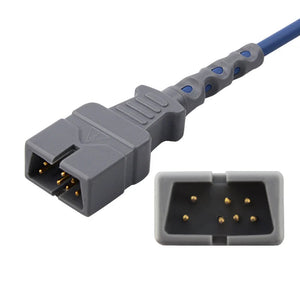
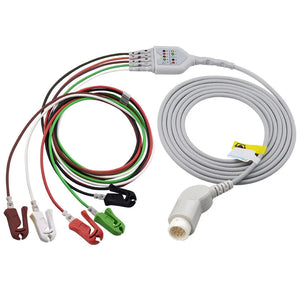
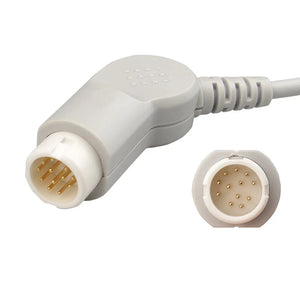
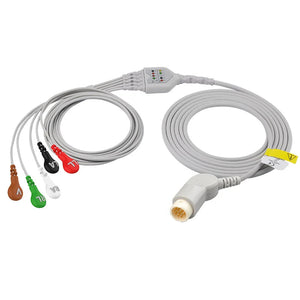
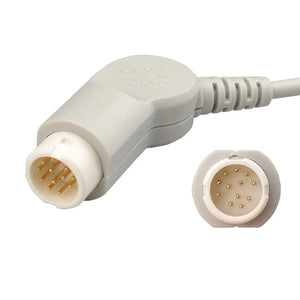
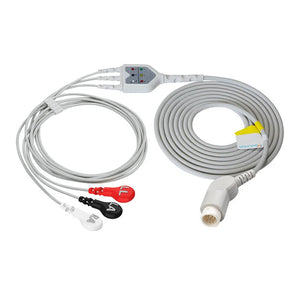
Philips-Compatible ECG Leadwire (5-Lead / Snap) — M1644A
When degraded cabling is the last 60 Hz suspect: a TPU-jacketed leadwire built to reduce signal interference, AAMI EC53 / AHA coded, fitting Philips IntelliVue & MP-series monitors.
4Motion Artifact
Motion artifact comes from patient movement during the recording. It's the most preventable artifact on this list, and the one most likely to mimic life-threatening arrhythmias.
What It Looks Like
Sudden, irregular deflections appear at unpredictable intervals. Each individual artifact looks slightly different from the next — there's no rhythm to it, no pattern. The baseline can jump abruptly and then return. In its severe form, motion artifact can produce wide, chaotic complexes that on quick glance look exactly like ventricular tachycardia or even ventricular fibrillation.

The VT/VF Mimicry Danger
This is the only artifact on the list that has actually triggered defibrillator pads in real ED departments. Before treating a "lethal arrhythmia" on the monitor, do these three things in sequence — they take five seconds total:
- Look at the patient. Awake, talking, in no distress? It's not VF.
- Palpate the carotid or femoral pulse. A palpable pulse rules out VF, full stop.
- Correlate with symptoms. Real VT/VF patients are unconscious within seconds.
Treating the monitor instead of the patient is how someone gets shocked unnecessarily. Always treat the patient.
Common Causes
Patient talking during the recording (the classic "hold still" moment when they ask "should I hold my breath?"), coughing or sneezing, repositioning to scratch an itch, the clinician inadvertently bumping the bed or touching the cables, and cable movement from a tucked-in cable being pulled when the bed is adjusted.
How to Fix It
✓ Motion Artifact Fix Protocol (under 30 seconds):
- Give a clear verbal instruction: "Please lie very still and don't talk for 10 seconds — I'll tell you when we're done"
- Wait for movement to actually stop before pressing record
- Make sure the cables aren't pulling on any electrode — slack should be visible
- Step back from the patient and the bed during the actual recording
- If the patient genuinely cannot stay still (respiratory distress, agitation, altered mental status): document the limitation, capture the cleanest tracing you can, and consider serial ECGs once they stabilize
5Electrode Contact Problems (Electrode Pop)
Electrode contact artifacts — known on the floor as "electrode pop" — happen when an electrode intermittently breaks contact with the skin. The signal abruptly cuts and reconnects, and on the tracing it looks like someone hit the strip with a black marker.
What It Looks Like
Sharp vertical deflections — square-shouldered, almost rectangular — appear in specific leads at random intervals. Only the leads connected to the problem electrode are affected, which is what makes electrode pop so easy to localize compared to other artifacts.

Common Causes
Loose electrode with the edge lifting from the skin, dried gel from an electrode that's been on the patient too long, hairy chest preventing adhesion (more common than people realize — and the reason every ECG machine should ship with a disposable razor), sweaty skin breaking the seal, and a cable clip that's not fully snapped onto the electrode. That last one trips up new staff weekly — the clip will loosely sit on the electrode and look connected, but it isn't.
How to Fix It
✓ Electrode Pop Fix Protocol (45 seconds):
- Identify which lead(s) are affected — that points you straight at the problem electrode
- Inspect that electrode physically: is it lifting? Is the gel dry? Is the clip fully snapped on?
- Replace it with a fresh electrode. Don't try to re-stick a lifted one — adhesives don't recover
- If hairy: shave the area before applying the new electrode
- Re-prep the skin (alcohol, dry, light abrasion) and apply the fresh electrode
- Press firmly for 10 seconds and confirm the cable clip is fully engaged
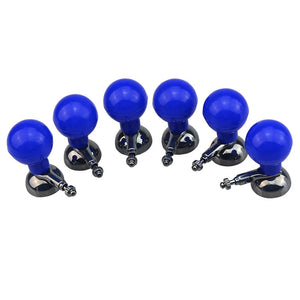
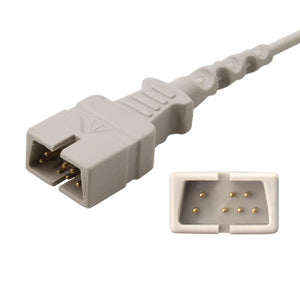
Suction-Cup Chest Electrodes — Adult (Multi-function, 24mm)
For diagnostic ECG rooms where adhesives lift on hairy or sweaty chests: reusable 24 mm cups hold steady contact pressure to cut electrode pop. 6 pcs/box · fits 3.0 mm DIN, 4 mm banana & snap · Nihon Kohden / GE / Philips.
Identifying Which Electrode Is the Problem
The pattern of affected leads tells you which electrode to fix — same logic as baseline wander but applied to spike artifact:
| Leads Affected | Problem Electrode |
|---|---|
| I, II, all precordial leads | RA (right arm) |
| I, III, aVL, aVF | LA (left arm) |
| II, III, aVF | LL (left leg) |
| All leads noisy | RL (right leg / ground) |
| Single V lead only | That specific V electrode |
6Lead Reversal Artifact
Lead reversal isn't "noise" in the traditional sense — it's an artifact of incorrect electrode placement that produces a technically clean but diagnostically wrong ECG. The tracing looks beautiful. The interpretation is wrong.
What It Looks Like
The ECG is artifact-free in the traditional sense, but the morphology is wrong. The most common pattern is LA-RA (left arm / right arm) reversal, which produces an inverted P wave and inverted QRS in Lead I, paired with an upright P wave and upright QRS in aVR. Lead II and Lead III also swap when the arms are reversed. Precordial reversals (V1 and V2 swapped, for example) produce unexpected R-wave progression that doesn't match the patient's clinical picture.
For detailed lead reversal patterns and recognition tips, see our 10 common ECG placement mistakes guide.
The Classic Pattern: LA-RA Reversal
Recognize it by three findings — and check every single ECG you accept against this list:
- Lead I: inverted P wave and inverted QRS (should normally be upright)
- aVR: upright P wave and upright QRS (should normally be inverted)
- Lead II = Lead III: they swap when the arms are reversed
How to Fix It
✓ Lead Reversal Fix Protocol (90 seconds):
- Recognize the pattern — inverted Lead I plus upright aVR equals arm reversal until proven otherwise
- Trace each cable physically from electrode to machine
- Verify colors match positions:
- White / RA → right arm
- Black / LA → left arm
- Green / RL → right leg
- Red / LL → left leg
- (AHA convention; IEC convention uses different colors — check your hospital's standard)
- Correct any misconnections
- Re-record and verify Lead I is now upright and aVR is inverted before accepting the new tracing
Prevention Is Everything
Lead reversal is 100% preventable with systematic technique. Always attach leads in the same sequence, verify colors before pressing record, and check Lead I and aVR for the expected pattern before walking away. I built a habit early in my career of glancing at aVR every single time — if it's upright, something is wrong, and that one-second check has caught dozens of misplacements over the years.
Systematic ECG Artifact Troubleshooting Approach
When you see a noisy ECG, don't panic and don't randomly start changing things. Follow this four-step protocol — it works every time and rarely takes more than 90 seconds total.
Step 1: Characterize the Artifact (10 seconds)
| Ask Yourself | If Yes, Likely Cause |
|---|---|
| Slow and undulating? | Baseline wander |
| Fine and irregular? | Muscle tremor |
| Perfectly regular and fast? | 60 Hz interference |
| Sudden spikes during movement? | Motion artifact or electrode pop |
| Lead I inverted, aVR upright? | Lead reversal |
Step 2: Identify Which Leads Are Affected (10 seconds)
All leads → check the RL ground electrode first, or look for a generalized environmental cause (cold patient, electrical interference). Limb leads only → check the limb electrodes. Specific lead pattern → use the lead-electrode mapping tables above to point at the exact electrode.
Step 3: Apply the Specific Fix (30–60 seconds)
Use the targeted fix protocol from the sections above. Most fixes are mechanical and take well under a minute once you know the cause.
Step 4: Re-record and Verify (30 seconds)
Record a new tracing and confirm the artifact is gone. If it persists, return to Step 1 and reconsider the cause — sometimes there are two artifact types layered on top of each other, and you can only see the second one once the first is fixed.
✓ Pro Tip: If you've tried everything and artifact persists, swap the entire ECG machine. About once a year I'll find a damaged trunk cable or a faulty filter board that's been quietly producing artifact on every patient that machine touches. When all the bedside fixes fail, the equipment itself is the next suspect.
Prevention: The Best ECG Artifact Troubleshooting
The fastest way to fix artifacts is to prevent them in the first place. Internal QI data and the published clinical literature both suggest proper preparation reduces artifact rates by roughly 40%. The checklist below is the one we use for new staff orientation.
Pre-Recording Checklist
Artifact Prevention Checklist
- ☐ Environment: room warm, cell phones away, unnecessary equipment off
- ☐ Skin prep: clean, dry, lightly abraded (the "pink skin" rule)
- ☐ Electrodes: in-date, gel moist, pressed firmly for 10 seconds
- ☐ Patient: supine, arms relaxed at sides, pillows for support
- ☐ Cables: not pulling on electrodes, not running parallel to power cords
- ☐ Communication: patient understands to stay still and quiet
- ☐ Verify: Lead I upright, aVR inverted before accepting the tracing
For the complete preparation protocol, see our ECG preparation guide. When you are restocking, fresh in-date electrodes such as our disposable adult ECG electrodes ($11.90, 21% off) are the single cheapest way to prevent baseline wander before it starts.
Equipment Maintenance
Check electrode expiration dates monthly (and rotate stock — first in, first out), inspect cables for visible damage weekly, clean patient cable connections with the manufacturer's recommended solution, and service ECG machines per the manufacturer's PM schedule. Cable damage is sneaky — a fraying inner conductor can produce intermittent artifact long before the outer jacket shows any wear. For replacement cabling, it helps to know how connector fit and signal stability are verified before a leadwire reaches the bedside, since a marginal pinout can mimic exactly this kind of intermittent noise.
Build Artifact Recognition Skills
Like any clinical skill, artifact recognition improves with deliberate practice. Our ECG quality control system guide includes structured training protocols for building these competencies in new staff.
Frequently Asked Questions
Why is my ECG showing artifact?
ECG artifact has six common causes: poor electrode contact (dried gel, lifting electrodes), muscle activity (shivering, tension, tremor), 60 Hz electrical interference from nearby equipment, patient motion, intermittent electrode pop, and lead reversal at the cable connection. Identify the visual pattern first — slow undulation, fine fuzz, perfectly regular oscillation, or sudden spikes — then apply the targeted fix. Most artifacts can be eliminated in under 60 seconds at the bedside.
How do I fix wandering baseline on an ECG?
Remove the affected electrodes (limb leads first, since those wander most), clean the skin with alcohol and let it dry completely, abrade gently with gauze until the skin is slightly pink, apply fresh in-date electrodes with moist gel and press for a full 10 seconds, ask the patient to breathe normally rather than deeply, and re-record. The single most common root cause is expired electrodes — always check the package date before going further.
How do I tell the difference between muscle tremor artifact and atrial fibrillation?
Look at the QRS rhythm, not the baseline. In true AF the ventricular rhythm is irregularly irregular — RR intervals vary randomly. In muscle tremor with underlying sinus rhythm, the RR intervals are regular even though the baseline looks chaotic. Two practical bedside checks: warm the patient with a blanket and re-record (true AF won't change, tremor often disappears), and palpate the radial pulse — if it's regular while the monitor reads "irregular," suspect tremor.
When should I use the ECG machine's filter settings?
Filters should be a last resort because they alter ECG morphology. The standard diagnostic-mode bandpass is 0.05–150 Hz; switching to monitor mode (0.5–40 Hz) will mask ST changes and is unsafe for ischemia screening. Use the muscle (high-frequency) filter only for tremor you cannot control physically (e.g., Parkinson's). Use the 60 Hz notch filter only after eliminating all electrical interference sources at the bedside. Document filter use on the tracing.
What if the patient simply cannot stay still?
Do your best, then document the limitation explicitly on the ECG: "Patient unable to remain still due to [respiratory distress / altered mental status / pain]." Capture the cleanest tracing you can, interpret with the understanding that artifact may be present, and order serial ECGs once the patient stabilizes. Never sedate solely to obtain a clean ECG — the clinical situation is always more important than the tracing.
How often should ECG electrodes be replaced during continuous monitoring?
Replace electrodes every 24 hours during continuous monitoring, or sooner if you see lifting edges, dried gel, or new artifact appearing. The conductive gel begins drying within 24–48 hours of skin contact, dramatically increasing impedance and triggering false alarms. For one-time diagnostic ECGs, always use fresh electrodes from a sealed package — never reuse a partially-used pack from yesterday.
What does 60 Hz interference on an ECG look like?
60 Hz (AC) interference appears as extremely regular, perfectly uniform fast oscillations creating a thickened-looking baseline. The pattern is too perfect to be biological — at 60 cycles per second the oscillations are uniform in both amplitude and frequency. In countries using 50 Hz mains power (most of Europe and Asia), the same artifact appears at 50 Hz. Common sources: IV pumps, electric beds, fluorescent lighting, cell phones, and degraded ECG cable shielding.
How do I identify lead reversal on an ECG?
The classic sign of LA-RA (arm lead) reversal is an inverted P wave and inverted QRS in Lead I, paired with an upright P wave and upright QRS in aVR. Lead II and Lead III also swap when arms are reversed. Always check Lead I and aVR before accepting any ECG — if Lead I is negative and aVR is positive, the arms are reversed. Re-attach correctly and record again.
Mastering ECG Artifact Troubleshooting
ECG artifact troubleshooting is a fundamental clinical skill that improves with deliberate practice. The key is pattern recognition: each artifact type has a distinctive visual signature that points directly to its cause, and once you've identified the cause, the fix is almost always mechanical and fast.
Four core principles for managing artifacts on ECG tracings, summarized from years of bedside experience:
- Characterize first. Slow or fast? Regular or irregular? Which leads are affected? Don't start changing things until you know what you're looking at.
- Fix at the source. Filters mask problems; they don't solve them. Replace the electrode, eliminate the interference, calm the patient.
- Prevention beats correction. Forty percent fewer artifacts is what proper preparation buys you, and that's a lot of saved time over a shift.
- Correlate clinically. Always look at the patient, not just the screen. The monitor lies sometimes; the patient almost never does.
Master these ECG artifact patterns and you'll spend less time wrestling with noisy tracings and more time making accurate diagnoses. Clean data you can trust is the only goal that matters.
Stop Fighting Artifacts — Start with Quality Accessories
Most ECG artifacts trace back to the same root causes: dried-out electrodes, degraded leadwires, or incompatible cables. MedLinket manufactures a complete line of ECG accessories engineered for clean signal capture, compatible with Philips, GE, Mindray, Nihon Kohden, Schiller, and Mortara monitors used in U.S. hospitals.
Serving 2,000+ hospitals across 120+ countries · ISO 13485 · FDA & CE certified
Free monitor compatibility verification: shopify@medlinket.com
MedLinket Clinical Education Team
Our team includes ICU and ED registered nurses, cardiac monitoring technicians, and biomedical engineers with combined decades of bedside experience troubleshooting ECG artifacts. This guide reflects real cases from U.S. hospitals — including the "tremor mistaken for AF" scenario in Section #2 and the "60 Hz from a hallway floor buffer" case in Section #3 — combined with AHA evidence-based best practices and AAMI cable maintenance standards. Last reviewed April 2026.