📚 Series Article: This guide is part of our comprehensive 12 Lead ECG Placement: The Ultimate Guide. For the complete placement technique, start there first.
When Preparing to Obtain a 12 Lead ECG: 5 Essential Steps
When preparing to obtain a 12 lead ECG, what you do before placing the first electrode determines everything that follows. After years of rushing through preparation and wondering why the tracings looked terrible, the lesson became clear: proper ECG lead placement starts long before you touch an electrode.
Environment, patient positioning, skin preparation, equipment checks, and patient communication — these five steps take less than 90 seconds combined, yet they prevent the large majority of common quality issues. This guide walks through exactly what to do, including the specific techniques that turn a mediocre accuracy rate into a consistently excellent one.
In This Article
Why ECG Preparation Matters More Than You Think
Research from the American Heart Association indicates that up to 40% of ECG artifacts stem from inadequate preparation — not electrode placement errors. That means nearly half of all quality issues are preventable before you even begin positioning leads.
When obtaining a 12 lead ECG, the patient should be in an optimal state for recording. This means:
- Minimal electrical interference from the environment
- Relaxed muscles to prevent tremor artifact
- Clean, prepared skin for optimal electrode contact
- Functioning equipment with fresh electrodes
- A cooperative patient who understands the process
Skip any of these, and you're setting yourself up for a suboptimal tracing — or worse, a completely uninterpretable one that needs to be repeated.
Step 1: Environment Check (First 15 Seconds)
Before touching your patient, scan the room. This takes 15 seconds and prevents the most frustrating artifacts.
What to check
Electronic devices: ask the patient to turn off their mobile phone or place it at least 6 feet away. Smartphones generate electromagnetic interference that appears as irregular baseline noise — phone notifications can create artifacts that mimic arrhythmias.
Room temperature: if it's cold, your patient will shiver, and shivering creates muscle tremor artifact that can completely obscure the ECG. Ideal room temperature is 68–72°F (20–22°C). If you can't control the temperature, provide a warm blanket for areas not being used for electrode placement.
Privacy: close the curtain or door. A patient who feels exposed will be tense, and muscle tension creates artifact. Beyond the clinical benefit, it's simply respectful care.
💡 Pro Tip: Check for other electrical equipment near the bed — IV pumps, bed motors, and monitoring equipment can all cause 60Hz interference. Move them away if possible, or note their presence if the tracing shows artifact.
Step 2: Correct Patient Positioning for Proper Lead Placement
The standard position when obtaining a 12 lead ECG is supine (lying flat) or semi-recumbent at 30 degrees. But real patients don't always fit the textbook.
A frontline discussion on patient positioning for ECGs — from r/NewToEMS.
Standard positioning
For most patients, semi-recumbent at 30 degrees works well. The patient should have:
- Arms resting at their sides (not crossed over the chest)
- Legs uncrossed and relaxed
- Head supported comfortably
Adaptations for challenging patients
Obese patients — three positioning modifications that work:
- Arms folded on the abdomen (reduces shoulder muscle tension)
- Slight left lateral tilt (improves breathing comfort)
- Head elevated to 45 degrees if 30 degrees causes discomfort
Patients who cannot lie flat: record the ECG in whatever position they can tolerate — even fully seated — and document it clearly on the tracing. According to LITFL's ECG guidelines, position changes can affect voltage amplitude by 10–20%, but a seated ECG is infinitely better than no ECG.
Documentation example: "ECG recorded with patient seated upright at 90 degrees — unable to tolerate recumbent position due to respiratory distress."
For detailed guidance on where to place the electrodes once your patient is positioned, see our 12 Lead ECG Placement Diagram guide.
Step 3: Skin Preparation — The Foundation of Correct ECG Lead Placement
This is where you should spend the most time, and it's where most people rush. Don't. For proper ECG lead placement to work, the electrodes need direct contact with clean, prepared skin. Dead skin cells, oils, lotions, and sweat all act as insulators that block the electrical signal.

The "pink skin rule"
Use dry gauze to briskly rub each electrode site until the skin becomes slightly pink — not red, not abraded, just pink. This indicates you've removed the dead skin layer and improved conductivity.
Skin preparation protocol
- Assess the skin: look for sweat, lotion, excess hair, or debris.
- Clean if needed: for sweaty patients, use an alcohol wipe and let it dry completely (10–15 seconds).
- Abrade gently: rub with dry gauze until slightly pink.
- Remove hair if necessary: shave a patch slightly larger than the electrode using a disposable razor (electric razors don't get close enough).
Why this matters
Research published in clinical monitoring journals shows that proper skin preparation reduces artifact by approximately 40% — nearly half of all quality issues eliminated by 60 seconds of preparation.
⚠️ Common Mistake: Applying electrodes before the alcohol fully dries. Wet alcohol prevents adhesion and can actually increase impedance. Wait until the skin is completely dry.
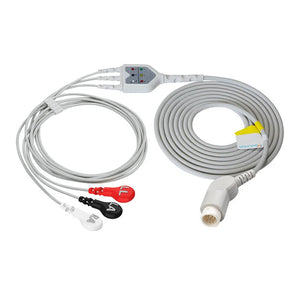
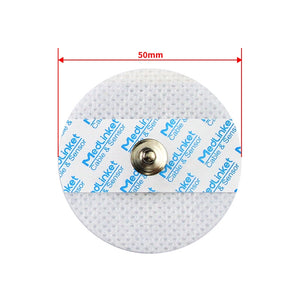
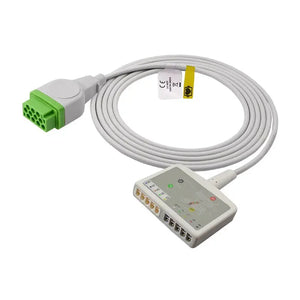
Step 4: Electrode Quality Check
Even perfect skin preparation won't help if your electrodes are compromised.
Before opening the packet
Squeeze the electrode packet gently. The gel inside should feel moist and pliable. If it feels dry or the packet is stiff, the gel has likely dried out.
Check the expiration date
An entire shift of poor tracings can come down to one thing — every electrode in the drawer being expired. Check dates routinely: expired electrodes have degraded gel that provides poor conductivity and adhesion.
After opening
Inspect the electrode before application:
- Gel should be moist and evenly distributed
- Adhesive border should be intact (no curling edges)
- Connector should be clean and undamaged
Keep spare electrodes on hand for exactly this reason — it's faster to grab a fresh one than to troubleshoot a poor connection mid-recording.
Step 5: Patient Communication for Cooperation
A cooperative patient is essential for a quality tracing. When placing ECG leads on a patient, clear communication prevents movement artifact and reduces anxiety.
A script that works
"I'm going to place some stickers on your chest and limbs to record your heart's electrical activity. The test takes about 2 minutes. During the recording, I need you to stay as still as possible — even talking can interfere with the reading. I'll let you know when we're done."
This script accomplishes three things:
- Explains what you're doing (reduces anxiety)
- Sets clear expectations (stay still, don't talk)
- Provides a timeline (2 minutes — manageable for most patients)
For anxious patients
If the patient seems nervous, add: "This doesn't hurt at all — the stickers are just listening to your heart. Take a few slow, deep breaths to relax." Having them take three slow breaths before recording often eliminates the muscle tension that was about to ruin your tracing.
Quick Preparation Checklist
Use this checklist before every ECG to support proper lead placement and accuracy:

✓ Pre-ECG Preparation Checklist
Environment (15 seconds)
- ☐ Patient's phone off or distant
- ☐ Room temperature comfortable
- ☐ Curtain/door closed for privacy
- ☐ Nearby electronics identified
Patient Position (15 seconds)
- ☐ Supine or semi-recumbent at 30°
- ☐ Arms at sides, legs uncrossed
- ☐ Position documented if non-standard
Skin Preparation (45 seconds)
- ☐ Skin assessed for sweat/lotion/hair
- ☐ Alcohol wipe if needed (and dried)
- ☐ Gauze abrasion until pink
- ☐ Hair shaved if necessary
Equipment (10 seconds)
- ☐ Electrode gel moist
- ☐ Expiration date valid
- ☐ Cables connected and untangled
Communication (15 seconds)
- ☐ Procedure explained
- ☐ "Stay still" instruction given
- ☐ Patient calm and ready
Total time: approximately 90 seconds. This small investment prevents the 5–10 minutes you'd spend troubleshooting a poor-quality tracing or repeating the entire ECG.
What Comes Next: Proper ECG Lead Placement
With preparation complete, you're ready for the actual electrode placement. The next critical steps involve:
- Limb leads: learn the symmetry rules and color codes in our 5 Lead ECG Placement guide.
- Chest leads: master V1–V6 positioning with our 12 Lead ECG Placement Diagram.
- Female patients: special considerations in our ECG Placement for Female Patients guide.
Final Thoughts on ECG Preparation
When preparing to obtain a 12 lead ECG, remember that these five preparation steps aren't bureaucratic checkboxes — they're the foundation of diagnostic accuracy. Every minute spent on proper preparation saves time downstream and, more importantly, helps ensure your patient gets an accurate diagnosis.
Experienced clinicians run through this checklist every single time — not because they have to, but because skipped preparation leads to artifacts, repeat tests, delayed diagnoses, and frustrated patients. Take the 90 seconds and do it right; your tracings, and your patients, will thank you.
Frequently Asked Questions
What position should a patient be in for a 12-lead ECG?
The standard is supine (lying flat) or semi-recumbent at 30 degrees, with arms resting at the sides and legs uncrossed. If a patient can't lie flat, record in whatever position they tolerate — even seated — and document the position clearly, since position changes can affect voltage amplitude.
Why is skin preparation important before an ECG?
Dead skin cells, oils, lotions, and sweat act as insulators that block the heart's electrical signal. Cleaning and gently abrading the skin until it's slightly pink improves electrode contact and, according to clinical monitoring research, can reduce artifact by roughly 40%.
How long should ECG preparation take?
About 90 seconds total across the five steps: environment check (15s), positioning (15s), skin preparation (45s), equipment check (10s), and patient communication (15s). That small investment prevents the 5–10 minutes spent troubleshooting or repeating a poor tracing.
How can you tell if ECG electrodes are still good?
Squeeze the unopened packet — the gel should feel moist and pliable, not dry or stiff. Check the expiration date, and after opening, confirm the gel is moist and evenly distributed, the adhesive border is intact with no curling edges, and the connector is clean and undamaged.
How do you reduce movement artifact during an ECG?
Keep the room comfortably warm to prevent shivering, position the patient with relaxed, uncrossed limbs, and explain that they should stay still and avoid talking during the roughly 2-minute recording. For anxious patients, a few slow, deep breaths beforehand help release muscle tension.
📚 Continue Learning:
This article is part of our 12 Lead ECG Placement: The Ultimate Guide series.
Next article: 12 Lead ECG Placement Diagram: V1–V6 Chest Lead Positioning →
Clinical Education Team
Our clinical education team comprises experienced healthcare professionals dedicated to providing accurate, practical guidance for ECG placement and interpretation, drawing on extensive hands-on experience across emergency, critical care, and outpatient settings.