📚 Series Article: This guide is part of our comprehensive 12 Lead ECG Placement: The Ultimate Guide. Before attempting 15-lead ECG, ensure you've mastered standard V1-V6 placement, right-sided leads, and posterior leads.
15 lead ECG placement gives you what the standard 12-lead cannot: a complete electrical picture of the heart, including the right ventricle and posterior wall that are invisible on routine ECGs. When you're facing a complex acute coronary syndrome, these additional views can be the difference between catching a STEMI and missing it entirely.
The concept is straightforward: a standard 12-lead ECG plus three additional leads—typically V4R for right ventricular assessment and V8-V9 (or V7-V8-V9) for posterior wall evaluation. The challenge is that most ECG machines only have 10 electrode inputs, so you need a systematic approach to capture all 15 views.
This guide walks you through exactly how to perform 15 lead ECG placement, when it's clinically indicated, and the practical workflow that makes it efficient even in time-critical situations.
⚡ Key Takeaways
- 15-lead ECG = Standard 12-lead + V4R + V8 + V9 (or similar combination)
- Most machines have only 10 inputs—requires sequential recordings
- Primary indication: Inferior STEMI with suspected RV or posterior involvement
- Total time: approximately 3-4 minutes for complete 15-lead acquisition
- Can catch STEMIs that standard 12-lead misses
In This Guide
- What Is a 15 Lead ECG?
- When to Use 15 Lead ECG Placement
- Equipment Reality: Working with 10 Inputs
- Step-by-Step 15 Lead ECG Placement Technique
- Alternative 15 Lead ECG Lead Placement Methods
- 15 Lead vs 18 Lead ECG: What's the Difference?
- Clinical Scenarios and Interpretation
- 10 Lead ECG Placement Practice Tips
What Is a 15 Lead ECG?
A 15-lead ECG extends the standard 12-lead by adding three additional views that assess areas the standard leads cannot see.
Standard 12-Lead ECG Components
The standard 12-lead provides:
- Limb leads (6): I, II, III, aVR, aVL, aVF — Views of frontal plane
- Precordial leads (6): V1-V6 — Views of anterior, septal, and lateral walls
What it cannot see:
- Right ventricle
- Posterior wall of left ventricle
The Additional 3 Leads
A 15-lead ECG typically adds:
| Additional Lead | Position | What It Sees |
|---|---|---|
| V4R | 5th ICS, right midclavicular line | Right ventricle |
| V8 | Below left scapula tip, V6 level | Posterior wall |
| V9 | Left paraspinal, V6 level | Posterior wall |
Some protocols use V7, V8, V9 for the posterior leads instead of just V8-V9. The choice depends on your facility's protocol and time constraints.
Why These Specific Leads?
According to American Heart Association guidelines:
- V4R has 88% sensitivity for right ventricular infarction
- V8-V9 can detect posterior STEMI that appears only as ST depression in V1-V3 on standard ECG
Together, these three leads expand your diagnostic capability by approximately 20-30%—catching MIs that would otherwise be missed or delayed.
When to Use 15 Lead ECG Placement
Not every patient needs a 15-lead ECG. Here are the specific indications:
Primary Indications
✓ Perform 15-lead ECG when you see:
- Inferior STEMI (ST elevation in II, III, aVF) — Check both RV and posterior
- ST depression in V1-V3 — May indicate posterior STEMI
- Inferior STEMI with hypotension — High suspicion for RV involvement
- High clinical suspicion with non-diagnostic 12-lead
- Lateral STEMI with anterior ST depression — Possible posterior extension
The Classic Scenario
The most common scenario requiring 15-lead ECG:
Comment
byu/CA_Lifeguard from discussion
inemergencymedicine
Patient presents with chest pain. Standard 12-lead shows:
- ST elevation in II, III, aVF (inferior STEMI)
- ST depression in V1-V3 (suggests posterior involvement)
- ST elevation in III > II (suggests RCA occlusion, higher RV risk)
This patient needs both V4R (to assess RV) AND posterior leads (to confirm posterior involvement). A 15-lead ECG captures everything in one systematic approach.
When NOT to Use 15-Lead ECG
- Routine screening: Standard 12-lead is sufficient
- Clearly anterior STEMI: V4R and posterior leads won't add diagnostic value
- When it would delay definitive treatment: In obvious STEMI, don't delay cath lab for additional leads
Equipment Reality: Working with 10 Electrode Inputs
Here's the practical challenge: most ECG machines have exactly 10 electrode inputs (4 limb + 6 precordial). A true simultaneous 15-lead would require 13 inputs. Since most facilities don't have this equipment, you need a workaround.
The Standard Equipment Limitation
| ECG Type | Electrodes Needed | Standard Machine? |
|---|---|---|
| Standard 12-lead | 10 electrodes | ✓ Yes |
| 15-lead ECG | 13 electrodes | ✗ Requires sequential recording |
| 18-lead ECG | 16 electrodes | ✗ Requires sequential recording |
Solutions
Option 1: Sequential Recording (Most Common)
Run standard 12-lead first, then move specific electrodes and run additional recordings. This is the method most facilities use.
Option 2: Specialized 15-Lead ECG Machine
Some newer ECG machines have 15 or 18 electrode inputs. If your facility has one, use it—it's much faster.
Option 3: Multiple Standard Machines
In some settings, two ECG machines are used simultaneously with different electrode configurations. This is rare but possible in well-resourced facilities.
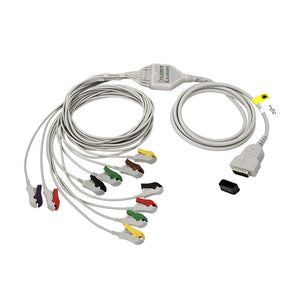
Whichever workaround you use, if you're sourcing replacement cables or electrodes to support extended-lead acquisition, it helps to understand what "compatible" actually means for medical accessories before matching parts to your specific machine.
Step-by-Step 15 Lead ECG Placement Technique
Here's my systematic approach to 15 lead ECG placement using standard equipment with sequential recording.
Phase 1: Standard 12-Lead ECG (2 minutes)
- Place all 10 electrodes in standard positions:
- 4 limb electrodes (RA, LA, RL, LL)
- V1-V6 in standard chest positions
- Run and print the 12-lead ECG
- Immediately assess: Is this inferior STEMI? ST depression V1-V3?
For detailed V1-V6 positioning, see our 12 lead ECG placement diagram guide.
Phase 2: Right-Sided Lead V4R (30 seconds)
- Leave V1, V2, V3 in place — Don't move these
-
Move V4 electrode to the right side:
- 5th intercostal space
- Right midclavicular line
- Mirror image of standard V4 position
- Leave V5, V6 in place for now (or remove if not needed)
- Run ECG and label as "V4R"
For detailed V4R technique, see our right-sided ECG lead placement guide.

Phase 3: Posterior Leads V8-V9 (90 seconds)
- Note V6's horizontal level — All posterior leads must match this level
-
Reposition or add electrodes:
- Move V4 (currently at V4R) to V8 position: below left scapula tip
- Move V5 to V9 position: left paraspinal area, 2-3 cm from spine
- Alternatively, use V4 and V5 cables for V8 and V9
- Ensure horizontal alignment with V6
- Run ECG and label as "Posterior Leads V8-V9"
For detailed posterior lead technique, see our posterior ECG lead placement guide.

Phase 4: Final Assembly and Documentation
- Collect all three ECG strips
- Label clearly:
- Strip 1: "Standard 12-Lead ECG"
- Strip 2: "V4R - Right Ventricular Lead"
- Strip 3: "V8-V9 - Posterior Leads"
- Attach together or document in the same record
- Note time of acquisition for each
✓ Time-Saving Tip: If your machine has a "right-sided" or "posterior" lead setting, use it—it will automatically relabel the leads on the printout, saving documentation time.
Complete 15-Lead ECG Placement Summary
| Phase | Leads Captured | Time | Key Action |
|---|---|---|---|
| 1 | I, II, III, aVR, aVL, aVF, V1-V6 | 2 min | Standard 12-lead |
| 2 | V4R | 30 sec | Move V4 to right side |
| 3 | V8, V9 | 90 sec | Reposition to posterior |
| Total | 15 leads | ~4 min | Complete cardiac assessment |
Alternative 15 Lead ECG Lead Placement Methods
Different facilities and clinical situations may require variations on the standard approach.
Method A: V4R + V7-V8-V9 (Full Posterior)
Some protocols prefer three posterior leads instead of two:
- Phase 2: V4R (same as above)
- Phase 3: Move V4→V7, V5→V8, V6→V9
This gives 16 total views (essentially a "16-lead" ECG) but takes slightly longer.
Method B: Simultaneous V4R + V8 (Minimal Approach)
When time is extremely critical:
- Run standard 12-lead
- Simultaneously move V4→V4R and V5→V8
- Run single additional ECG capturing both right and posterior
This is faster but sacrifices V9 and provides less comprehensive posterior assessment.
Method C: Dedicated 15-Lead Machine
If your facility has a machine with additional inputs:
- Place all 13 electrodes simultaneously
- Run single acquisition
- Machine automatically labels all 15 leads
This is the gold standard but requires specialized equipment.
15 Lead vs 18 Lead ECG: What's the Difference?
You may encounter references to 18-lead ECG. Here's how they compare:
15 Lead ECG
- Composition: Standard 12 + V4R + V8 + V9 (or V7-V8-V9)
- Right-sided coverage: V4R only
- Posterior coverage: 2-3 leads
- Best for: Most clinical situations requiring extended views
18 Lead ECG
- Composition: Standard 12 + V3R-V6R (4 right-sided) + V7-V9 (3 posterior)
- Right-sided coverage: Full right precordial series
- Posterior coverage: Complete posterior series
- Best for: Research, comprehensive documentation, complex cases
Which to Choose?
According to European Society of Cardiology recommendations, for routine clinical practice:
- 15-lead is sufficient for most diagnostic purposes
- V4R alone has excellent sensitivity for RV MI
- V8-V9 capture the clinically significant posterior territory
Use 18-lead when you need comprehensive documentation or when 15-lead findings are equivocal.
Clinical Scenarios and Interpretation
Scenario 1: Inferior STEMI with RV Involvement
15-lead ECG findings:
- Standard 12-lead: ST elevation II, III, aVF; ST depression V1-V3
- V4R: ST elevation ≥1mm ✓
- V8-V9: ST elevation ≥0.5mm ✓
Interpretation: Inferoposterior STEMI with right ventricular involvement
Management implications:
- Avoid nitrates (preload-dependent RV)
- Aggressive IV fluids
- Cath lab activation with full territory awareness
Scenario 2: Isolated Posterior STEMI
15-lead ECG findings:
- Standard 12-lead: Isolated ST depression V1-V3, no inferior changes
- V4R: Normal
- V8-V9: ST elevation ≥0.5mm ✓
Interpretation: Isolated posterior STEMI (STEMI-equivalent)
Management implications:
- This is a STEMI—treat as such despite "only" having ST depression on 12-lead
- Cath lab activation
Scenario 3: High Suspicion, Non-Diagnostic 12-Lead
15-lead ECG findings:
- Standard 12-lead: Non-specific ST-T changes
- V4R: Normal
- V8-V9: Normal
Interpretation: True non-STEMI or very early presentation
Management implications:
- 15-lead helped rule out RV and posterior involvement
- Continue monitoring, serial ECGs
- Clinical correlation required
10 Lead ECG Placement Practice Tips
Mastering 15 lead ECG placement requires solid fundamentals. Here's how to develop your skills with 10 lead ECG placement practice.
Build Foundation First
Before attempting 15-lead, ensure you can:
- Place standard 12-lead accurately — See our V1-V6 placement guide
- Identify anatomical landmarks quickly — Angle of Louis, intercostal spaces, axillary lines
- Troubleshoot common artifacts — See our artifact troubleshooting guide
Practice Sequence
- Week 1-2: Master standard 12-lead placement (aim for <2 minutes)
- Week 3: Add V4R practice (aim for <30 seconds to reposition)
- Week 4: Add posterior leads (aim for <90 seconds)
- Week 5+: Full 15-lead sequence (aim for <4 minutes total)
Simulation Practice
Many online resources offer 10 lead ECG placement practice simulators. While these don't replace hands-on training, they help with:
- Anatomical landmark identification
- Lead position memorization
- Troubleshooting scenarios
Common 15-Lead Errors to Avoid
For a comprehensive error list, see our 10 common ECG placement mistakes guide. The top 15-lead specific errors:
- Forgetting to label each recording — Without labels, which strip is V4R?
- Posterior leads not aligned with V6 — Produces inaccurate assessment
- Taking too long — In STEMI, speed matters; practice until it's fast
- Not keeping V1-V3 stable — These should remain unchanged throughout
Frequently Asked Questions: 15 Lead ECG
Q: Can I do 15-lead ECG with any standard ECG machine?
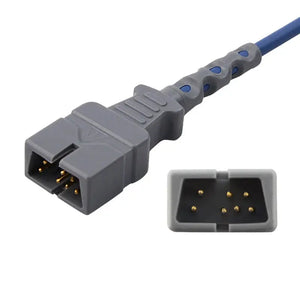
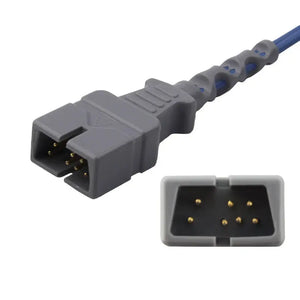
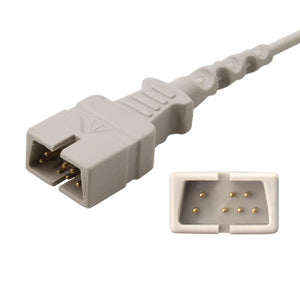
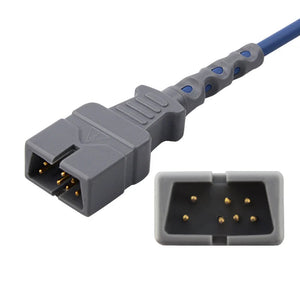
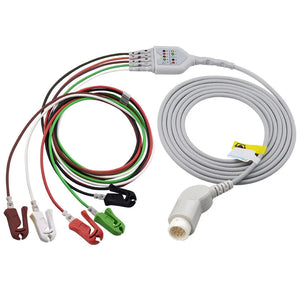
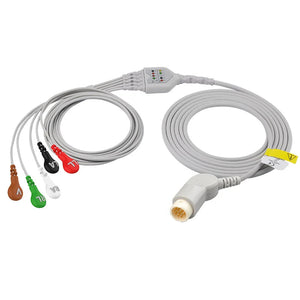
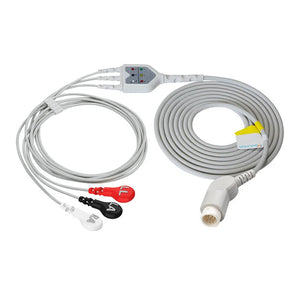
A: Yes, but you'll need sequential recordings. Most machines have only 10 inputs, so you run the standard 12-lead first, then reposition electrodes and run additional recordings. Some newer machines have 15 or 18 inputs for simultaneous acquisition. Whichever you use, the connection to the patient still runs through a standard 10-lead cable such as our GE Marquette 10-lead direct-connect cable ($96, 20% off).
Q: How long should a 15-lead ECG take?
A: With practice, approximately 3-4 minutes total: 2 minutes for standard 12-lead, 30 seconds for V4R, and 90 seconds for posterior leads including repositioning the patient.
Q: Should I do 15-lead on every chest pain patient?
A: No. Reserve 15-lead for inferior STEMI, ST depression in V1-V3, clinical suspicion of RV or posterior involvement, or when standard 12-lead doesn't match clinical presentation. Routine chest pain workup starts with standard 12-lead.
Q: What if the patient can't be repositioned for posterior leads?
A: Do what you can. V4R alone (no repositioning needed) still provides critical RV information. For posterior leads in immobile patients, try the log-roll technique or document that posterior leads couldn't be obtained due to patient positioning.
Q: Why use V8-V9 instead of V7-V8-V9?
A: V8 (below scapula tip) is considered the most sensitive single posterior lead. V8-V9 provides adequate posterior coverage for most clinical decisions. V7-V8-V9 is more comprehensive but takes additional time. Choose based on your facility's protocol and time constraints.
Mastering 15 Lead ECG Placement
15 lead ECG placement is an essential skill for any clinician managing acute coronary syndromes. By extending beyond the standard 12-lead, you gain visibility into the right ventricle and posterior wall—territories responsible for 20-30% of missed STEMIs.
Remember the key principles of 15 lead ECG placement:
- When: Inferior STEMI, ST depression V1-V3, or high clinical suspicion
- What: Standard 12-lead + V4R + V8-V9 (or V7-V8-V9)
- How: Sequential recording on standard equipment, or simultaneous with specialized machines
- Time: Approximately 3-4 minutes with practice
- Impact: Catches STEMIs that standard 12-lead misses
The extra few minutes required for 15 lead ECG lead placement can fundamentally change patient management—from treatment approach to cath lab strategy. That's time well invested for every patient who needs it.
📚 This Guide Completes the Special Leads Series
Return to the main guide: 12 Lead ECG Placement: The Ultimate Guide
Related special leads articles:
Clinical Education Team
Our clinical education team includes emergency medicine physicians and cardiologists with extensive experience in acute MI management. This guide reflects current AHA/ESC guidelines combined with practical clinical workflows developed in high-volume emergency departments.