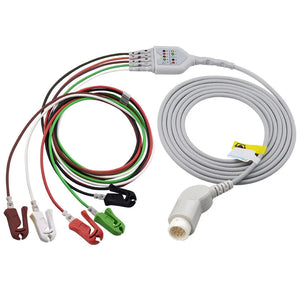
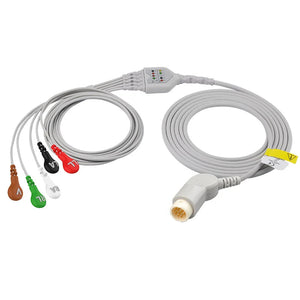
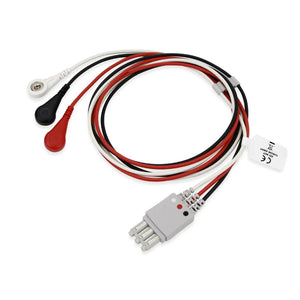
For 3-lead ECG using AHA colors: place RA (white) on the right upper chest just below the clavicle, LA (black) on the left upper chest at the same height, and LL (red) on the left lower chest/abdomen. Keep RA and LA level with LL clearly inferior, add gentle cable slack, then confirm a steady baseline with clear P waves in Lead II before you record.
Mnemonic: “white to right” · “smoke (black) over fire (red)” on the left
🎯 Key takeaways
- AHA color code: White → RA (right), Black → LA (left), Red → LL (lower-left). Keep a small, stable triangle.
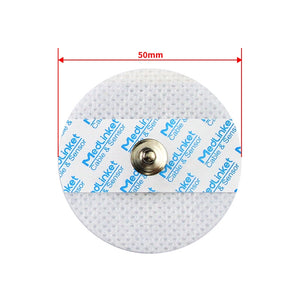
- Skin prep fixes most artifact: clean, dry, and de-grease the skin; warm the gel; reach for high-adhesion electrodes on diaphoretic skin.
- Verify in Lead II every time: steady baseline, visible P waves, and no 50/60-Hz buzz before you press record.
- Transport or OR? Use a torso (Modified Mason–Likar) layout to beat motion, document it, and revert to limb positions once stable.
- Troubleshoot in order: skin → pad → cable → environment, and rule out lead reversal before blaming hardware.
- Buying parts: match the connector and the color standard (AHA vs IEC) to your monitor to avoid downtime and returns.
3 lead ECG placement feels simple—until noise, poor adhesion, or lead reversal derails a reading when it matters. This practical, textbook-meets-user-guide gives you the confidence to place RA/LA/LL correctly the first time, verify signal quality fast, and avoid the small mistakes that create big problems during transport, pre-op checks, or bedside monitoring.
You’ll get quick wins you can apply today (skin prep that actually reduces artifact, stepwise placement using AHA colors, and a 30-second verification routine), plus clear guidance for torso placement in motion-prone settings.
We’ll tackle common pain points—baseline wander, AC interference, and “why does this rhythm look wrong?”—with a simple troubleshooting flow. Working with pedi or neonatal patients? We’ll show skin-safe adjustments and adhesive choices that protect fragile skin without sacrificing fidelity.
Buying or stocking accessories? A concise compatibility matrix helps you match leadwires and trunk cables to your monitors, cut downtime, and prevent costly returns. Keep reading to master placement, prevention, and problem-solving in one session.

Quick wins for 3-lead ECG placement
You came here for speed and certainty—so here’s a 30-second routine you can rely on when every second counts. In busy units, small slip-ups with 3 lead ECG placement (poor skin prep, cable tension, color mix-ups) create big problems: baseline wander, muscle artifact, and false alarms. This fast checklist gets you from pads to clean rhythm without backtracking.
You’ll learn how electrode position shapes your vectors, how to confirm correct placement on the monitor, and when to pivot to torso placement for motion-heavy scenarios.
For reliability, pair good technique with durable accessories—consider a Philips-compatible ECG trunk cable (M1669A) that matches your monitor and color standard. Safety first: never place over open wounds, active rashes, or implanted device pockets; follow facility policy and the device IFU. For clinical fundamentals, see the American Heart Association. (This guide is educational and does not replace clinical judgment or local protocol.)
30-second quick routine
- Prep (5–10s): Clean/dry skin, shave if needed, warm the gel. Verify cable integrity and pad expiry.
- Place (10–15s): RA right upper chest near clavicle; LA left upper chest near clavicle; LL left lower chest/abdomen. Keep slack—no tugging.
- Display & verify (10–15s): Show Lead II, watch 3–5 beats: steady baseline, crisp P-QRS-T, minimal noise. If not clean, re-prep and reseat.
Place fast, verify faster (what “good” looks like on the monitor)
Good equals readable and repeatable. After placement, select Lead II for dependable P-wave visibility. You’re aiming for:
- a stable isoelectric line without slow drift;
- distinct P waves and narrow QRS for sinus rhythm;
- no 50/60-Hz buzz and no tremor spikes when the patient relaxes.
If the trace isn’t clean, fix in this order: skin re-prep → reseat the loosest electrode → confirm color-to-landmark mapping → inspect cable strain relief and connectors. Reassess after each tweak. Safety check: avoid adhesive over irritated skin; if the patient has an ICD or pacemaker pocket, keep pads clear of the pocket and route leads to prevent traction.
When vector quality remains poor despite corrections, reassess 3 lead ECG position or escalate to 5-/12-lead per protocol.
Landmark memory hook (RA/LA/LL with color cues)
Use short, stickable cues that hold up under pressure:
- “White to right.” RA = white pad on the right upper chest near the clavicle.
- “Smoke over fire.” LA = black pad on the left upper chest; LL = red pad below on the left lower chest/abdomen.
- Keep a small triangle. RA and LA at similar heights; LL clearly inferior and left-lateral to stabilize vectors.
These hooks speed accurate 3 lead ECG placement and cut rework. If your device uses IEC colors, translate the cues in the IFU and align staff training to that standard. For fragile or post-op skin, opt for gentle-adhesive electrodes and consider alternative sites approved by policy. Remember: landmarks first, cables second; neat routing prevents artifact and accidental dislodgement.
Common rookie mistakes to avoid today
- Pads on bone or oily skin → noise. Move onto muscle, cleanse again, dry fully.
- Cable tension → intermittent dropout. Add slack and strain relief; route under clothing or a light blanket.
- Color swap = lead reversal. Trace each wire from pad to connector; say the color mantra aloud before recording.
- Torso placement in the wrong context. Use torso (Modified Mason-Likar) for motion/transport; document and revert to limb positions when feasible.
- Ignoring the monitor. Always watch several beats to confirm a calm baseline and clear P waves.
Prevention checklist: get clean signals the first time
Most artifacts can be prevented before the first beat ever scrolls across the screen. This practical checklist gives you a fast, reliable routine to prep the patient, validate your hardware, and route leads safely—so your placement 3 lead ecg efforts pay off with stable, readable traces.
Think of it as a preflight for bedside monitoring: clear the skin, check the consumables, then confirm the route. These steps work across care areas and help standardize 3 lead ecg position choices, regardless of brand.
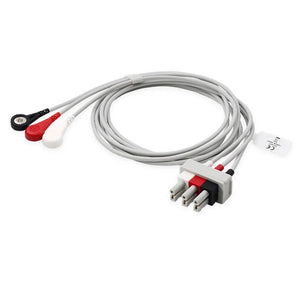
To pair good technique with dependable hardware, consider a durable lead set—try the Philips M1605A ECG leadwire as your in-unit workhorse. Safety never takes a back seat: avoid compromised skin, keep lines clear of devices and incisions, and follow your facility policy and device IFU.
Done consistently, this checklist reduces repeat placements, limits false alarms, and shortens the time from patient arrival to confident monitoring—especially when verifying ecg lead placement 3 lead under pressure.
Patient & skin prep (clean/dry/shave; sweat & lotion workarounds)
- Clean: Wipe with mild soap/water or approved wipe; remove oils, lotions, and makeup. Pat fully dry.
- De-bulk hair: Clip (don’t razor) if hair prevents full electrode contact.
- Exfoliate lightly: If policy allows, use a skin prep pad to reduce impedance; avoid abraded or fragile skin.
- Sweat control: Fan-dry or use a cool towel; if diaphoretic, consider antiperspirant wipes approved by policy.
- Warm the gel: Rub the pad between gloved fingers for a second; warmer gel adheres better.
- Lotions present? Degrease again; choose high-adhesion pads designed for moist skin.
Cable/electrode checklist (connector fit, expiry, strain relief)
- Electrodes: Check expiry and packaging seal; discard dried or curled pads.
- Leadwires: Inspect snaps/clips for corrosion or looseness; verify a crisp click/fit.
- Connector: Seat the patient lead firmly at the monitor; no wobble, no intermittent signal.
- Strain relief: Route with slack; avoid tight bends at the electrode or connector.
- Continuity test: If your monitor supports it, run a quick lead integrity check.
- Standard match: Confirm AHA vs IEC labeling aligns with your training and monitor settings.
Safety tick-offs (sensitive skin, adhesive test, lead route)
- Adhesive test: For sensitive or pediatric skin, test on a non-critical area first; use gentle-adhesive options.
- Device awareness: Keep pads/leads clear of pacemaker or ICD pockets and recent surgical sites.
- Route smart: Run cables under clothing/blanket with slack; avoid snags on bed rails and IV lines.
- Fall & entanglement: Coil excess near the monitor, not the patient; use clips if available.
- Label & document: Note any alternate sites and the rationale in the record.
Standard 3-lead placement — step by step
Use this verified sequence to make 3 lead ECG placement predictable, teachable, and easy to audit. The steps below follow AHA colors—RA white, LA black, LL red—and keep vectors consistent so your rhythm strip is clean the first time.
When you need dependable hardware to match technique, consider a sturdy set like the Philips M1673A ECG leadwire. The sequence also flags safety must-dos (no pads over wounds or implanted device pockets) and simple checks to confirm correct ecg lead placement 3 lead before you record.
RA, LA, LL anatomical landmarks + do/don’t notes
- RA (white): Right upper chest, just inferior to the clavicle at the mid-clavicular area on soft tissue (not bone). Don’t place directly over the clavicle; do keep the snap facing down to reduce tug.
- LA (black): Mirror RA on the left upper chest. Keep RA and LA at comparable heights to stabilize vectors. Don’t straddle the deltoid; do land on flat muscle.
- LL (red): Left lower chest/abdomen, lateral to the umbilicus on soft tissue. Don’t go too medial or on the costal margin; do ensure a clear inferior position relative to LA.
- Cable slack: Leave gentle loops; avoid sharp bends at snaps.
- Consistency: Document sites if you deviate for clinical reasons.

Supine vs sitting; hair/clothing/perspiration tactics
Supine: Landmarks are easiest; keep RA/LA symmetrical and LL clearly inferior. Slide pads slightly lateral if breast tissue or dressings obstruct. Sitting: Expect more motion. Add extra slack and route cables downward under clothing to dampen tug; recheck adhesion after posture changes. Hair: Clip (don’t shave) only as needed for full gel-to-skin contact.
Clothing: Move straps and seams; avoid pad edges rubbing fabric. Perspiration: Fan-dry, degrease again, and warm the gel between gloved fingers before placement. For diaphoretic skin, choose high-adhesion electrodes approved by policy.
Post-placement verification (clean baseline, stable rhythm)
Confirm you’ve nailed the setup before recording:
- Display Lead II: It usually maximizes P-wave visibility; verify a steady isoelectric baseline without slow drift.
- Artifact check: No 50/60-Hz buzz, minimal muscle spikes when the patient relaxes, and no cable “flicker” from tension.
- Beat audit: Watch 3–5 beats: distinct P-QRS-T morphology, plausible rate, and consistent amplitude. If off, reseat the loosest pad, re-prep skin, then recheck.
- Color trace-back: Confirm white-right (RA), black-left (LA), red-lower-left (LL) from pad to connector to avoid reversal.
Standard limb vs torso (transport/OR) — quick comparison
When motion or sterile fields make standard limb positions impractical, a torso configuration (often called Modified Mason–Likar) can keep monitoring continuous. Use this side-by-side to decide quickly during ecg 3 lead placement and document any deviations from policy.
Pair technique with dependable hardware—secure connectors reduce tug and noise; consider a Philips-compatible trunk cable (M1669A — $56, 18% off) for transport. Safety first: never place over wounds, rashes, or implanted device pockets; follow your device IFU and facility protocol for 3 lead placement for ecg in the OR.
| Aspect | Standard limb (RA/LA near clavicles; LL lower left torso) | Torso (Modified Mason–Likar) |
|---|---|---|
| Primary use | Routine bedside rhythm monitoring | Transport, pre-op/OR, motion-prone care |
| Pros | Traditional vectors; familiar waveforms | Less motion artifact; easier cable management |
| Trade-offs | More susceptible to movement | Vector shift may alter amplitudes; document change |
| Notes | Keep RA/LA level; LL clearly inferior/left-lateral | Maintain triangular symmetry; avoid midline bony sites |
Indications/contraindications (motion, surgical access)
- Indications: Transport, OR with sterile fields, heavy shivering/tremor, device tethers that tug on limb pads.
- Relative contraindications: Need for strict waveform comparability to prior limb-lead tracings; teaching situations where standard vectors are required.
- Absolute safety exclusions: Open wounds, burns, or active dermatitis; avoid pacemaker/ICD pockets and recent incisions; comply with electrosurgery precautions.
- Documentation: Record “torso placement in use,” time started, and reason.
Torso points & symmetry tips (keep vectors consistent)
- RA (white): Right upper chest, just below the clavicle on soft tissue—lateral to the sternum; not on bone.
- LA (black): Mirror on the left upper chest; keep RA and LA at comparable heights to stabilize vectors.
- LL (red): Left lower torso—anterior axillary line, below the costal margin on soft tissue (avoid the midline/umbilicus).
- Form a small, stable triangle; equalize cable slack to reduce tug.
- Fan-dry perspiration; warm gel; choose high-adhesion pads if diaphoretic.
- Route cables downward under clothing/blanket; avoid sharp bends at snaps.
Revert-to-standard rule after transport
- When: As soon as motion/sterile constraints end (arrival to unit or end of case).
- How: Return RA/LA to upper chest near clavicles and LL to lower left abdomen; confirm “white-right, black-left, red-lower-left.”
- Verify: Display Lead II; look for a steady baseline, clear P waves, and plausible amplitudes compared with prior limb-lead tracings.
- Document: Note the time of reversion and any waveform differences; update orders if monitoring mode changes.
Pediatric/neonatal landmarks & gentle adhesives (avoid abrasion)
- Landmarks (scaled): Place RA/LA on the upper chest just below the clavicles over flat muscle; LL on the left lower abdomen/lateral torso—never on the umbilicus or bony ridge.
- Adhesive choice: Use neonatal/pediatric electrodes with mild tack and soft hydrogel. Warm pads in gloved hands for 2–3 seconds to improve seal without pressure.
- Prep light: Cleanse and pat completely dry. Avoid abrasive prep on fragile or preterm skin; clip hair only if it truly blocks contact.
- Removal: Support skin and peel low and slow along the plane of the skin; use adhesive remover compatible with neonatal care when policy allows.
Motion artifact minimization (swaddle/secure; shorter leads)
- Contain motion: Swaddle infants; for toddlers, use snug clothing to stabilize pads and route cables downward under garments.
- Cable strategy: Choose shorter leadwires where possible; leave small service loops for slack and anchor to clothing with a soft clip.
- Environment: Calm, warm room; reduce startling. Recheck adhesion after feeds, diaper changes, or repositioning.
- Quick audit: After settling, watch 3–5 beats in Lead II for a steady baseline and visible P waves; reseat any edge that lifts.

Troubleshooting: clean up noise and confirm correct setup
When traces get messy, move through this quick decision path before repeating placement 3 lead ecg. Start with patient and pad factors, then cables, then the monitor. If artifacts persist, rule out lead reversal and consider hardware.
Pair good technique with reliable gear—try a durable Philips-compatible leadwire (M1671A). Always follow your device IFU and local policy for ecg lead placement 3 lead.
Fix baseline wander, muscle tremor, AC interference
- Baseline wander (slow sway): Re-prep oily/sweaty skin, dry completely, reseat the loosest pad on soft tissue (not bone). Add cable slack; minimize patient movement and deep breathing during the sample.
- Muscle tremor (spiky noise): Ask the patient to relax hands/shoulders, warm the room if shivering, and support limbs. Re-route leads to avoid tug; consider shorter leads if available.
- AC interference (50/60-Hz buzz): Separate ECG from power cords, ensure the bed/rails aren’t energizing the cable, and verify the ground/reference. Inspect for cracked insulation at snaps/connectors.
- Quick audit order: Skin → pad seal → cable slack → connector fit → environmental cords & pumps.
Spot & confirm lead reversal on 3-lead (pattern clues)
- Clues in Lead II: Inverted P waves with otherwise plausible QRS, or sudden axis flip after a pad change, suggest RA/LA reversal.
- Color mantra: Trace white-right (RA), black-left (LA), red-lower-left (LL) from pad to connector; say it aloud before recording.
- Rapid confirmation: Briefly swap back the last two pads you moved; if the morphology normalizes, you found the reversal.
- Document: Note the correction time so future rhythm strips make sense clinically.
When to swap consumables/cables or escalate to 5/12-lead
- Swap consumables: If a pad edge lifts, gel is dry, or the seal fails after re-prep, replace the electrode.
- Swap cables/leadwires: Intermittent “flicker” with gentle tug testing or visible jacket cracks = replace the leadwire; use a new, tested set such as the durable Philips-compatible leadwire (M1671A).
- Escalate: Persistent artifact despite fixes, ischemia concern, or need for localization → move to 5-lead or 12-lead per protocol.
- Re-verify: After any swap, watch 3–5 beats in Lead II for a calm baseline and clear P waves.
Buyer & upkeep: compatibility and stocking
Purchasers and bedside users both win when accessories fit the monitor the first time and stay reliable in daily use. This section turns ecg lead placement 3 lead considerations into a practical shopping-and-upkeep checklist: match the connector, match the color standard (AHA vs IEC), stock the right lengths for adult vs pediatric units, and maintain a simple replacement cadence to avoid downtime. If you're new to sourcing non-OEM parts, it helps to first understand what "compatible" really means for monitoring accessories.
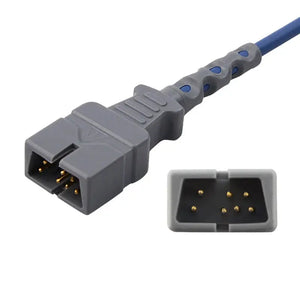
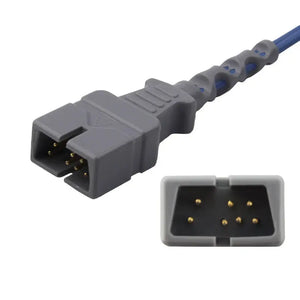
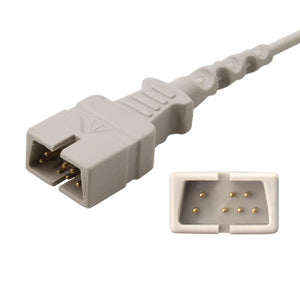
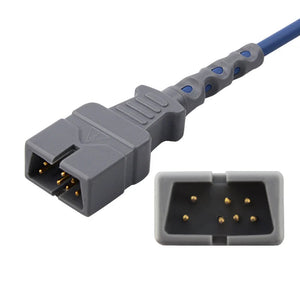
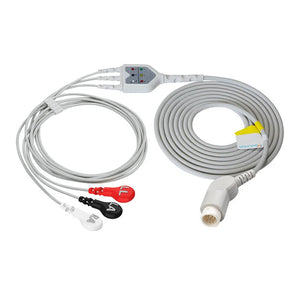
Start by confirming your monitor’s patient connector and color convention, then select the appropriate leadwire or trunk cable. For a ready-to-compare set, see these Philips-compatible leadwires and trunk cable: M1605A, M1673A, M1671A, and trunk cable M1669A. If your unit runs Philips IntelliVue monitors, you can browse the full Philips IntelliVue MP-series compatible accessories list to confirm the right match for your model.
Safety and compliance matter: ensure labeling is legible, insulation intact, and that your selection aligns with facility policy and the device IFU. With the right parts and a light-touch maintenance plan, your 3-lead ECG position choices will translate into clean, dependable rhythm strips day after day.
Identify connector & color standard; pick matching leadwire/trunk
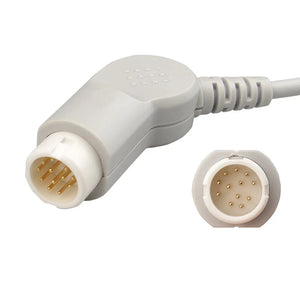
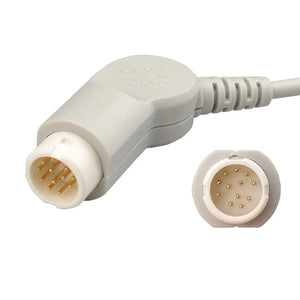
- Connector: Confirm the patient-side connector style on your monitor (brand/model family). Photograph it if needed to avoid mismatches — and see how we verify connector fit, pinout, and signal stability before a part ships.
- Color standard: Verify AHA (white/black/red) vs IEC equivalents; ensure the chosen leadwire set uses your facility’s standard.
- Select parts: Choose a leadwire set that matches both connector and standard—e.g., M1605A, M1673A or M1671A—and pair with the correct trunk cable M1669A.
- Adult vs peds: Stock shorter leads and gentler clips/adhesives for pediatric units; standard lengths for adults.
- Safety: Inspect insulation and snaps; reject any item with cracks, corrosion, or illegible labels.
Maintenance & replacement intervals (reduce downtime)
- Daily wipe-down: Clean per IFU with approved agents; dry thoroughly before storage or reuse.
- Weekly audit: Check strain-relief points, jacket nicks, and snap tension; tag and remove suspect sets.
- Quarterly swap plan: Proactively rotate high-use leadwires; keep a buffer of new sets to prevent delays.
- After any artifact chase: If intermittent “flicker” persists after proper placement, trial a new leadwire/cable before re-placing electrodes.
- Log it: Track lot/serials and service dates to spot failure trends and simplify recalls.
🎯 Stock a complete 3-lead chain for one bed
The Philips-compatible set referenced above — two interchangeable 3-lead snap leadwires plus the matching trunk cable
💡 Complete 3-lead chain ≈ $120 — two leadwire options (AHA snap) plus the matching M1669A trunk cable for one monitored bed.
FAQ: quick answers for clean, reliable 3-lead monitoring
Concise answers to the most common questions about 3 lead ECG placement—written for rapid decisions at the bedside and the purchasing desk.
Where do the 3-lead ECG electrodes go?
Use AHA colors: RA = white, LA = black, LL = red. Landmarks:
- RA (white): Right upper chest, just below the clavicle on soft tissue (not bone).
- LA (black): Left upper chest, mirroring RA at a similar height.
- LL (red): Left lower chest/abdomen, lateral to the umbilicus on soft tissue.
Keep gentle cable loops and avoid sharp bends at snaps. Verify in Lead II: steady baseline, visible P waves, minimal noise. If a landmark conflicts with dressings or devices, document the alternate site and confirm a clean tracing. This consistent approach to landmarks reduces re-placements and false alarms.
Can I place electrodes on the torso for transport?
Yes—use a torso configuration (Modified Mason–Likar) when motion, sterile fields, or lines make limb-level positions impractical. Keep a small triangular layout: RA/LA just below the clavicles on soft tissue; LL on the left lower anterior torso (avoid the midline). Benefits: less motion artifact and easier cable management. Trade-off: vectors shift, so amplitudes may differ from standard limb lead positions.
Safety: avoid wounds, burns, rashes, and implanted device pockets. Document “torso placement in use,” reason, and time. Revert to standard limb positions once conditions allow, then re-verify in Lead II. This preserves monitoring continuity without compromising patient safety or trace clarity during ecg 3 lead placement.
Why is my 3-lead ECG noisy and how do I fix it?
Work the fast order: skin → pad → cable → environment.
- Baseline wander: Re-clean and dry skin; reseat the loosest pad on muscle; ask for stillness or shallow breathing during the sample.
- Muscle tremor: Warm the room, support limbs, and route cables with slack.
- AC interference: Separate ECG cables from power cords; inspect snaps/connectors for cracks; confirm ground/reference.
If artifact persists after proper ecg lead placement 3 lead, swap the suspect electrode or leadwire and recheck. Never tape over damaged insulation. A clean, steady baseline with crisp P-QRS-T confirms you’ve solved the problem.
How do I spot a lead reversal on 3-lead?
Clues appear quickly in Lead II: unexpected P-wave inversion with otherwise plausible QRS, or a sudden axis flip after a pad change. Confirm by tracing color to site: “white-right (RA), black-left (LA), red-lower-left (LL).” If you swapped pads recently, reverse the last change briefly—if morphology normalizes, you found it.
Re-state landmarks out loud and document the correction time. Safety: if doubt remains, re-prep and re-place all three pads on soft tissue (not bone), then verify 3–5 beats. Consistent, documented technique keeps 3 lead ECG placement auditable across shifts.
When should I switch from 3-lead to 12-lead?
Escalate when you need localization or ischemia assessment (e.g., chest pain, ST-segment concerns), when rhythm features are ambiguous, or when persistent artifact masks clinical interpretation despite optimal placement. Also escalate for protocol-driven events (pre-op baselines, significant rate/rhythm changes, syncope with unclear etiology).
Keep a 5-lead/12-lead pathway ready so you can upgrade quickly without re-teaching landmarks. Safety: follow facility policy; never delay definitive diagnostics waiting for a “perfect” 3-lead trace if symptoms suggest acute ischemia.
Are AHA and IEC color codes different?
Yes. AHA commonly uses white (RA), black (LA), red (LL). IEC equivalents differ by color naming, even when positions match. Always match your leadwire set’s labeling to your monitor settings and staff training.
Post a small AHA↔IEC table near monitors and include it in onboarding. If traveling clinicians rotate through, label cables and snaps clearly to avoid reversal-like errors. This simple check keeps 3 lead ECG position consistent and prevents avoidable noise.
Which Philips-compatible cables/leadwires fit my monitor?
Identify your patient-side connector and color standard, then select parts that match both. See our Buyer & upkeep guide for a quick matrix covering leadwires and trunk cables (e.g., M1605A, M1673A, M1671A, M1669A). Safety: inspect insulation, snaps, and labeling before use; replace anything cracked or corroded. Good parts plus correct placement equals cleaner strips and fewer callbacks.
Any special tips for pediatric/neonatal skin safety?
Use pediatric/neonatal electrodes with gentle hydrogel; warm the pad briefly in gloved hands; avoid abrasive prep on fragile skin. Landmarks scale down: RA/LA just below the clavicles over flat muscle; LL on the left lower abdomen or lateral torso—never on the umbilicus or bone.
Swaddle infants, route cables downward with slack, and recheck adhesion after feeds. Document alternatives when standard sites aren’t possible.