Accurate 12 lead ECG placement is the foundation of reliable cardiac diagnosis. Whether you're a nursing student learning the basics, a paramedic in the field, or a seasoned clinician refreshing your skills, proper electrode positioning directly impacts the quality and accuracy of every ECG you record.
This comprehensive guide covers everything you need to know about ECG electrode placement—from the fundamentals of skin preparation to advanced techniques for special situations. We'll walk you through standard 12-lead positioning, 5-lead and 3-lead monitoring setups, right-sided and posterior leads for MI detection, and practical troubleshooting for common problems.
Consider this your complete reference for ECG lead placement. Each section provides an overview with links to detailed guides for deeper learning.
📖 Complete Guide Contents
- What is a 12-Lead ECG?
- ECG Preparation Essentials
- 3-Lead & 5-Lead Monitoring
- Precordial Lead Placement (V1-V6)
- ECG Placement for Female Patients
- Right-Sided Leads (V4R)
- Posterior Leads (V7-V9)
- 15-Lead ECG Placement
- Artifact Troubleshooting
- Common Placement Mistakes
- Quality Control Systems
- Special Patient Situations
- Mnemonics & Quick Reference
What is a 12-Lead ECG and Why Does Placement Matter?
A 12-lead ECG provides 12 different electrical views of the heart from 10 strategically placed electrodes—4 on the limbs and 6 on the chest. Each "lead" represents a specific angle of observation, allowing clinicians to assess different regions of the heart for ischemia, infarction, arrhythmias, and conduction abnormalities.

The 12 Leads at a Glance
| Lead Group | Leads | Heart Region Viewed |
|---|---|---|
| Limb Leads | I, II, III | Frontal plane (vertical slice) |
| Augmented Limb Leads | aVR, aVL, aVF | Frontal plane (additional angles) |
| Septal Leads | V1, V2 | Interventricular septum |
| Anterior Leads | V3, V4 | Anterior left ventricular wall |
| Lateral Leads | V5, V6, I, aVL | Lateral left ventricular wall |
| Inferior Leads | II, III, aVF | Inferior (diaphragmatic) wall |
Why Placement Accuracy Matters
Incorrect electrode placement is one of the most common sources of ECG error, yet it's entirely preventable. Studies show that V1 and V2 are placed too high in up to 50% of ECGs, which can create false-positive STEMI patterns or mask real pathology. Even small placement errors—as little as one intercostal space—can significantly alter the ECG morphology and lead to misdiagnosis.
The consequences of placement errors include unnecessary cardiac catheterizations, missed MI diagnoses, unreliable serial comparisons, and inappropriate treatment decisions. This guide will help you avoid these pitfalls through systematic technique and quality control.
ECG Preparation: Setting Up for Success
Before placing a single electrode, proper preparation sets the stage for a clean, interpretable ECG. This often-overlooked step prevents the majority of artifact problems and repeat recordings.
The 5 Essential Preparation Steps
- Patient positioning: Supine position is standard; semi-recumbent (30-45°) is acceptable when needed. Document any deviation from supine.
- Skin preparation: Clean the skin with alcohol, allow to dry completely, and gently abrade until slightly pink. This reduces impedance and improves electrode adhesion.
- Hair management: Clip (don't shave) excess hair at electrode sites to ensure full gel-to-skin contact.
- Equipment check: Verify electrode expiration dates, check that gel is moist, and inspect cables for damage.
- Patient communication: Explain the procedure, ask the patient to relax and stay still, and ensure privacy and comfort.
✓ Pro Tip: The "pink skin rule" is your friend—after prep, electrode sites should appear slightly pink from light abrasion. This indicates adequate skin preparation for optimal signal quality.
📚 Deep Dive: ECG Preparation: 5 Essential Steps Before You Start — Complete preparation protocol including equipment checklist and patient communication scripts.
3-Lead and 5-Lead ECG Monitoring
Before diving into diagnostic 12-lead ECGs, it's essential to understand continuous monitoring configurations. 3-lead and 5-lead setups are workhorses of bedside monitoring, providing real-time rhythm surveillance in ICUs, telemetry units, and during transport.

3-Lead ECG Placement
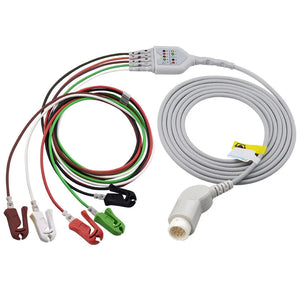
3-lead monitoring uses three electrodes (RA, LA, LL) to create leads I, II, and III. It's the simplest setup for basic rhythm monitoring during transport, pre-op checks, or situations where space and time are limited.
Standard placement (AHA colors):
- RA (White): Right upper chest, just below the clavicle
- LA (Black): Left upper chest, mirroring RA
- LL (Red): Left lower chest/abdomen, lateral to umbilicus
The classic mnemonic: "White on right, smoke over fire" (black/smoke on top, red/fire on bottom, both on the left side).
📚 Deep Dive: 3-Lead ECG Placement: Step-by-Step Guide — Complete guide including torso vs limb placement, pediatric considerations, and troubleshooting.
5-Lead ECG Placement
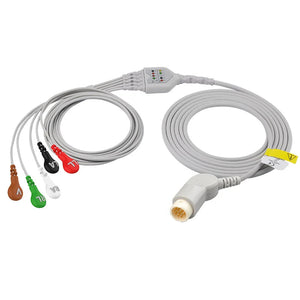
5-lead monitoring adds two more electrodes to the 3-lead setup: a ground electrode (RL) and one precordial lead (V). This provides rhythm monitoring plus one chest lead view—typically V1 for arrhythmia detection or V5 for ischemia monitoring.
Standard placement (AHA colors):
- RA (White): Right upper chest, below clavicle
- LA (Black): Left upper chest, below clavicle
- RL (Green): Right lower torso, above iliac crest (ground)
- LL (Red): Left lower torso, above iliac crest
- V (Brown): V1 position (4th ICS, right sternal border) OR V5 position (5th ICS, anterior axillary line)
Choosing V1 vs V5: Use V1 when arrhythmia detection is the priority (better P-wave visibility, easier SVT vs VT differentiation). Use V5 when ischemia monitoring is needed (lateral wall ST changes).
📚 Deep Dive: 5-Lead ECG Placement: Colors, Mnemonics & Steps — Complete guide with V1 vs V5 decision framework, color code comparison, and verification protocol.
Precordial Lead Placement: V1-V6 Diagram and Technique
The six precordial (chest) leads are where most placement errors occur—and where accuracy matters most for diagnosing anterior, septal, and lateral wall pathology. Mastering V1-V6 placement is the core skill of 12 lead ECG placement.

Finding Your Landmarks
The key to accurate placement is the Angle of Louis (sternal angle)—the horizontal ridge where the manubrium joins the sternum. This is where the 2nd rib attaches, making it your reliable starting point for counting intercostal spaces.
Step-by-step landmark identification:
- Find the sternal notch (the dip at the base of the neck)
- Slide your finger down the sternum until you feel a horizontal ridge—this is the Angle of Louis
- The 2nd rib attaches here; the 2nd intercostal space is just below
- Count down: 2nd ICS → 3rd ICS → 4th ICS (V1-V2 go here)
- Continue to 5th ICS for V4-V6
V1-V6 Positions
| Lead | Intercostal Space | Horizontal Position |
|---|---|---|
| V1 | 4th ICS | Right sternal border |
| V2 | 4th ICS | Left sternal border |
| V3 | Midpoint V2-V4 | Halfway between V2 and V4 |
| V4 | 5th ICS | Midclavicular line |
| V5 | Same level as V4 | Anterior axillary line |
| V6 | Same level as V4 | Midaxillary line |
⚠️ Critical Rule: Place V4 Before V3
V4 has a defined anatomical position (5th ICS, midclavicular line). V3 is defined as the midpoint between V2 and V4. Always place V4 first, then V3 is simply the measured midpoint—no guessing required.
📚 Deep Dive: 12 Lead ECG Placement Diagram: V1-V6 Positions — Detailed visual guide with photos, anatomical landmarks, and step-by-step technique.
Comment
byu/internetboyfriend666 from discussion
inaskscience
ECG Placement for Female Patients
Female patients require specific considerations for precordial lead placement. The presence of breast tissue creates unique challenges that, if not addressed properly, can lead to inaccurate readings and patient discomfort.
The Key Principle: Under, Not On
Electrodes V4, V5, and V6 should be placed under the breast at the inframammary fold, not on top of breast tissue. Breast tissue acts as an electrical insulator, attenuating the signal by 30-40% and distorting the ECG morphology.
Proper Technique
- Explain the procedure before touching the patient; offer a female clinician if available
- Maintain privacy with appropriate draping
- Identify V4 position (5th ICS, midclavicular line) at the inframammary fold
- Gently lift the breast (ask patient to assist if comfortable) to access the chest wall
- Place electrode on the chest wall at the inframammary crease, then release
- Continue with V5-V6 at the same horizontal level
For large-breasted patients, the inframammary fold provides a consistent landmark regardless of breast size. Communicate clearly, maintain dignity, and prioritize both accuracy and comfort.
📚 Deep Dive: 12 Lead ECG Placement for Female Patients — Complete guide with communication techniques, positioning options, and body habitus considerations.
Right-Sided Leads: Detecting Right Ventricular MI
Standard 12-lead ECGs provide limited visualization of the right ventricle. When an inferior STEMI is present (ST elevation in II, III, aVF), right ventricular involvement occurs in 30-50% of cases and significantly changes management. Right-sided leads—especially V4R—are the diagnostic solution.
When to Use Right-Sided Leads
- Inferior STEMI (ST elevation in II, III, aVF)
- Suspected right ventricular infarction
- Hypotension in the setting of inferior MI
- Jugular venous distension with clear lung fields
V4R Placement
V4R is the mirror image of V4 on the right side of the chest: 5th intercostal space at the right midclavicular line. It's the single most useful right-sided lead and should be obtained on every inferior STEMI.
Interpretation: ST elevation ≥1mm in V4R indicates right ventricular involvement. This changes treatment—avoid nitrates and diuretics, provide careful volume support.
📚 Deep Dive: Right-Sided ECG Lead Placement (V4R) — Complete guide including all right-sided lead positions (V1R-V6R), clinical indications, and interpretation criteria.
Posterior Leads: Finding Hidden Posterior MIs
The posterior wall of the left ventricle is "hidden" from standard 12-lead ECG views. Posterior MIs occur in 15-20% of acute MIs and are frequently missed because they present as ST depression (not elevation) in the anterior leads V1-V3—the "mirror image" phenomenon.
The Mirror Image Concept
When the posterior wall has true ST elevation (injury), leads V1-V3 see this from the front and display it as reciprocal ST depression. Posterior leads V7-V9, placed on the back, see the direct ST elevation.
When to Use Posterior Leads
- ST depression in V1-V3 (especially horizontal or downsloping)
- Tall R waves in V1-V2
- Inferior STEMI with suspected posterior extension
- High clinical suspicion for ACS with non-diagnostic standard ECG
V7-V9 Placement
All posterior leads are placed at the same horizontal level as V6, continuing around the left side of the back:
- V7: Posterior axillary line
- V8: Below the tip of the left scapula (most sensitive single posterior lead)
- V9: Left paraspinal border
Interpretation: ST elevation ≥0.5mm in V7-V9 indicates posterior STEMI (lower threshold than standard leads due to distance from heart).
📚 Deep Dive: Posterior ECG Lead Placement (V7-V9) — Complete guide including patient positioning for posterior access, combined approach with right-sided leads, and interpretation guidelines.
15-Lead ECG: The Complete Cardiac Picture
A 15-lead ECG combines the standard 12 leads with V4R (right ventricle) and V8-V9 (posterior wall), providing the most complete non-invasive assessment of the heart. It's particularly valuable for acute coronary syndromes where the culprit lesion location affects treatment.
What is a 15-Lead ECG?
15-Lead ECG = Standard 12-Lead + V4R + V8 + V9
Most ECG machines have only 10 electrode inputs, so obtaining a 15-lead requires sequential recording:
- Phase 1: Standard 12-lead (2 minutes)
- Phase 2: Move V4 electrode to V4R position (30 seconds)
- Phase 3: Move V4 and V5 electrodes to V8 and V9 positions (90 seconds)
When is 15-Lead Indicated?
- Any inferior STEMI (to assess RV and posterior involvement)
- ST depression in V1-V3 (to detect posterior MI)
- Non-diagnostic 12-lead with high suspicion for ACS
- Cardiogenic shock of unclear etiology
📚 Deep Dive: 15-Lead ECG Placement Guide — Complete protocol for sequential recording, equipment considerations, and clinical decision framework.
ECG Artifact Troubleshooting
Artifacts are noise that interferes with ECG interpretation—and they're often mistaken for pathology. Muscle tremor can mimic atrial fibrillation. Baseline wander can obscure ST changes. 60 Hz interference can simulate fine ventricular fibrillation. Knowing how to identify and fix artifacts is essential for accurate diagnosis.
The 6 Common Artifact Types
| Artifact | Appearance | Common Cause | Quick Fix |
|---|---|---|---|
| Baseline wander | Slow undulation | Poor electrode adhesion | Re-prep skin, fresh electrode |
| Muscle tremor | Fine irregular noise | Patient cold/tense | Warm room, relax patient |
| 60 Hz interference | Regular rapid oscillation | Electrical equipment | Remove electronics, check ground |
| Motion artifact | Sudden irregular spikes | Patient movement | Ask patient to stay still |
| Electrode pop | Sharp vertical spikes | Loose electrode | Replace affected electrode |
| Lead reversal | Inverted Lead I + upright aVR | Arm leads swapped | Check lead connections |
📚 Deep Dive: ECG Artifact Troubleshooting: 6 Common Types and How to Fix Them — Complete guide with pattern recognition, systematic troubleshooting protocol, and clinical mimics to avoid.
Help please! Artifact or something else?
byu/daisiesandroses20 inReadMyECG
10 Common ECG Placement Mistakes
Even experienced clinicians make placement errors—often without realizing it. Quality audits consistently reveal the same mistakes appearing across institutions. Knowing these common errors helps you avoid them and maintain diagnostic accuracy.
The Top 10 Errors
- V1-V2 placed too high (50% error rate): Creates false anterior STEMI patterns
- V4-V6 not horizontally aligned (33%): Distorts lateral lead morphology
- Electrodes on breast tissue (40% in females): Signal attenuation 30-40%
- Skipping skin preparation (35%): Causes artifact and poor quality
- Asymmetric limb lead placement (25%): Alters axis calculation
- Lead reversal (20%): Complete misdiagnosis; most commonly LA-RA swap
- "Eyeballing" V3 position (40%): Should measure exact midpoint
- Not checking V4R in inferior STEMI (70%): Misses RV involvement
- Inconsistent serial ECG placement (45%): Unreliable comparison
- Not documenting patient position (60%): Invalid serial comparison
The good news: every one of these errors is preventable with systematic technique, and every fix takes less than 60 seconds.
📚 Deep Dive: 10 Common ECG Lead Placement Mistakes and How to Fix Them — Detailed analysis of each error with clinical impact, recognition patterns, and prevention strategies.
ECG Quality Control Systems
Individual technique improvement is important, but sustainable quality requires a systems approach. Institutions that implement structured training programs, regular audits, and feedback mechanisms see dramatic reductions in placement errors—often from 45% to under 10%.
The 4-Pillar Quality Framework
- Standardized Training: Phased progression from theory to supervised practice to independence
- Deliberate Practice Protocol: Station-based skill building targeting specific competencies
- Monthly Quality Audits: Random sampling with standardized scoring
- Feedback and Recognition: Individual coaching and department-wide improvement initiatives
Measurable Results
Institutions implementing comprehensive quality systems report:
- Overall error rates: 45% → 8% (82% reduction)
- V1-V2 placement errors: 50% → 6%
- V4R compliance in inferior STEMI: 30% → 94%
- Repeat ECG rate: 15% → 3%
📚 Deep Dive: ECG Quality Control System: Training, Auditing, and Continuous Improvement — Complete implementation guide with training protocols, audit tools, and 90-day implementation plan.
Special Patient ECG Placement Situations
Standard ECG guides assume an ideal patient—thin, cooperative, lying flat with clear landmarks. Reality includes obese patients whose ribs you can't feel, post-surgical patients with chest dressings, COPD patients who can't lie flat, and amputees who lack standard electrode sites. These situations require adaptation while maintaining accuracy.
Common Special Situations
- Obesity: Use firm pressure to find Angle of Louis; document "estimated positions"
- Post-surgical: Work around dressings; never remove sterile coverings for ECG
- Respiratory distress: Record in tolerated position (semi-recumbent or seated); document position
- Amputees: Place electrodes on residual limbs or symmetrically on shoulders/hips
- Pediatrics: Use appropriately sized electrodes; landmarks scale with age
- Chest deformities: Use palpable landmarks; document the deformity
- ICU patients: Work around lines and drains; prioritize documentation
The Universal Rule
Document every adaptation. When you can't place electrodes in standard positions, note exactly what you did and why. This ensures interpreters understand any morphology changes and allows meaningful serial comparisons.
📚 Deep Dive: Special Patient ECG Placement: Obesity, Post-Surgery, and Challenging Situations — Complete guide covering 10 special situations with specific adaptation techniques.
ECG Placement Mnemonics & Quick Reference
When you need to place electrodes quickly and accurately, reliable mnemonics are invaluable. These memory aids have been tested and refined by clinicians worldwide.
Comment
byu/321-Go from discussion
inems
Essential Mnemonics
🧠 Limb Lead Colors (AHA)
"White on Right, Smoke over Fire"
- White = Right Arm
- Black (Smoke) = Left Arm
- Green = Right Leg (Ground)
- Red (Fire) = Left Leg
🧠 Precordial Lead Sequence
"2-4-5 Staircase Rule"
- V1-V2: 4th intercostal space
- V4: 5th intercostal space (place FIRST)
- V3: Midpoint between V2 and V4
- V5-V6: Same level as V4
🧠 Finding the Starting Point
"Louis = 2nd Rib"
The Angle of Louis marks the 2nd rib attachment. Count down: 2nd ICS → 3rd ICS → 4th ICS (V1/V2 here)
📚 Deep Dive: 12 Lead ECG Placement Mnemonic & FAQ: Quick Reference Guide — Complete collection of mnemonics, color code tables, and answers to 25+ common questions.
Summary: Your Path to Accurate ECG Placement
Mastering 12 lead ECG placement requires understanding the fundamentals, practicing systematic technique, and knowing how to adapt for special situations. The key principles that apply across all scenarios:
- Preparation matters: Clean, dry, abraded skin prevents most artifacts
- Landmarks are non-negotiable: Always find the Angle of Louis and count properly
- V4 before V3: Eliminates guessing for the midpoint
- Horizontal alignment: V4, V5, V6 must be at the same level
- Document everything: Position, adaptations, and any limitations
- Know when to add leads: V4R for inferior STEMI, posterior leads for anterior ST depression
Use this guide as your reference, explore the detailed articles for deeper learning, and practice until accurate placement becomes automatic. Your patients' diagnoses depend on the quality of the ECGs you record.
📚 Complete ECG Placement Guide Series
Foundation Skills
- ECG Preparation: 5 Essential Steps
- 3-Lead ECG Placement: Step-by-Step
- 5-Lead ECG Placement: Colors & Mnemonics
Standard 12-Lead Technique
Extended Leads for MI Detection
- Right-Sided ECG Lead Placement (V4R)
- Posterior ECG Lead Placement (V7-V9)
- 15-Lead ECG Placement Guide
Quality and Troubleshooting
Special Situations & Reference
Clinical Education Team
This comprehensive guide represents the collective expertise of our clinical education team—nurses, paramedics, and physicians who have performed thousands of ECGs and trained hundreds of clinicians. We've distilled evidence-based best practices into practical, actionable guidance that you can apply immediately.