By MedLinket Clinical Education Team | Reviewed by Biomedical Engineering Dept. | Updated: February 2026 | 12 min read
Quick Answer: When a patient monitor shows no reading—dashes, blanks, or zeros—systematically check: (1) Is the sensor or electrode actually connected to the patient? (2) Is the cable properly connected to the monitor? (3) Is the correct parameter enabled in the monitor menu? (4) Is the accessory compatible, undamaged, and not expired? Over 80% of no-reading issues are caused by loose connections, displaced sensors, or failed patient monitor accessories—not monitor hardware failures.
📚 This article is part of the Hospital Monitor Reading & Accessories Guide series.
Related: ECG Leads Off Alarm Fix · False Alarm Prevention · When to Call Biomed
You walk into the patient room and the patient monitor screen shows nothing but dashes where vital sign numbers should be. No SpO2 value. No heart rate. Maybe the ECG waveform has vanished entirely. Before you panic—or call Biomed at 2 AM—most "no reading" situations are caused by simple accessory and connection issues that bedside clinicians can fix in under two minutes.
This troubleshooting guide walks you through diagnosing and resolving no-reading problems on every major parameter—from SpO2 sensors and ECG cables to NIBP cuffs, temperature probes, and EtCO2 sampling lines. Whether you are a nurse, respiratory therapist, or BMET, you will know what to check, in what order, and when to escalate.
Estimated Time: 1–5 minutes per parameter | Difficulty: Beginner to Intermediate | Required: Spare sensors, electrodes, cables (keep backups stocked)
Table of Contents
The Golden Rule: Assess the Patient First
Before touching a single cable, look at your patient. A monitor showing dashes does not always mean equipment failure—it could mean a sensor has fallen off a patient who has genuinely deteriorated. As experienced nurses on clinical forums consistently emphasize: "Treat the patient, not the monitor." A patient who is awake, talking, and pink is telling you the problem is equipment. A patient who is unresponsive and cyanotic is telling you the problem is clinical—and every second counts.

⚠️ A flat ECG line could be a disconnected electrode or asystole. A blank SpO2 could be a displaced sensor or cardiac arrest. Always confirm the patient is responsive and stable before beginning equipment troubleshooting. If the patient is unresponsive with no pulse, initiate emergency protocols immediately.
Universal Troubleshooting Steps (All Parameters)
Regardless of which parameter shows no reading, these seven steps apply universally. Work through them in order—most problems resolve at Step 1 or 2.
| Step | Action | What You Are Checking |
|---|---|---|
| 1 | Check physical connection at the PATIENT end | Is the sensor/electrode on the patient and making good contact? |
| 2 | Check physical connection at the MONITOR end | Is the cable firmly seated in the correct port? |
| 3 | Verify the parameter is enabled in monitor settings | Did someone accidentally disable the parameter or change lead mode? |
| 4 | Inspect the accessory for damage or expiration | Is the sensor cracked, cable frayed, electrode dried out, or expired? |
| 5 | Swap with a known-good accessory (the "swap test") | Does the reading return with a different sensor/cable/electrode? |
| 6 | Restart the parameter module or the monitor | Could a software glitch be preventing signal processing? |
| 7 | Still no reading? → Call Biomed | Internal module, port, or board failure requires engineering support |

Pro Tip from the Field: Many experienced BMETs report that the single fastest diagnostic technique is the "swap test"—replacing the suspected faulty component with a known-good one. If the reading returns immediately, you have found your culprit. Keep spare patient monitor accessories stocked at every bedside station. AAMI recommends maintaining a "hero kit" on each unit for exactly this purpose.
SpO2 Shows No Reading (---)
An SpO2 parameter displaying dashes is one of the most common no-reading scenarios. Pulse oximetry depends on detecting the pulsatile component of arterial blood flow—without a detectable pulse at the sensor site, the monitor simply cannot calculate a value. The foundational principle: "No pulse, no pulse oximetry."
| Step | What to Check | Solution |
|---|---|---|
| 1 | Is the SpO2 sensor on the patient? | Reapply the sensor. Ensure the LED (red light) is positioned over the nail bed, with the detector directly opposite. |
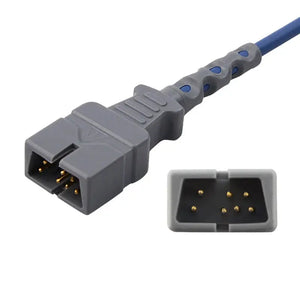
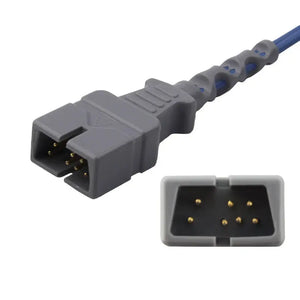
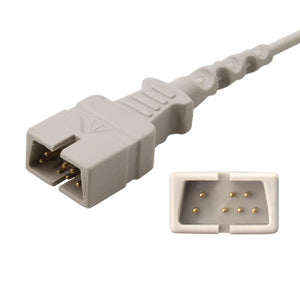
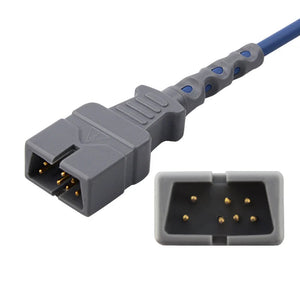
| 2 | Is the cable connected to the monitor? | Check both ends—sensor-to-cable junction AND cable-to-monitor port. Reseat the connector firmly. Check SpO2 adapter cables if using a two-piece system. |
| 3 | Is there a plethysmographic (pleth) waveform? | If no pleth waveform is visible, the sensor is not detecting a pulse. Reposition or try a different site. |
| 4 | Cold fingers or poor perfusion? | Warm the patient's hand. Consider switching to an ear clip sensor, which is less affected by peripheral vasoconstriction. |
| 5 | Nail polish, acrylic nails, or thick skin? | Remove nail polish if possible. Or rotate the sensor 90° sideways on the finger—light only needs to pass through tissue. |
| 6 | Sensor damage or age? | Check if the LED is flashing. If not, the emitter may be broken. Replace with a new sensor. |
| 7 | Ambient light interference? | Cover the sensor with an opaque cloth. Direct sunlight or bright procedure lights can overwhelm the photodetector. |

Clinical research shows that cold digits reduce SpO2 signal amplitude by up to 59%—making it impossible for many sensors to lock onto a reading. For patients with chronically poor perfusion (Raynaud's, peripheral vascular disease, sepsis-induced vasoconstriction), an ear clip or forehead SpO2 sensor often provides a more reliable signal than a finger sensor. Earlobes maintain richer blood supply and are less susceptible to vasoconstriction.
Just got a Fit Bit charge 5. No SpO2. Help ❤️🩹
by u/TypicalAd5658 in fitbit
These are clinical frontline experiences and should be treated as practical insights rather than authoritative guidelines.
💡 MedLinket Engineering Note: SpO2 Signal Technology Compatibility
A Nellcor OxiMax-technology sensor will display nothing if plugged into a Masimo SET-technology module—even if the connector physically fits. SpO2 sensors use proprietary signal processing algorithms, so technology matching is critical. MedLinket manufactures SpO2 sensors compatible with both Nellcor and Masimo technology platforms across 30+ monitor brands. For compatibility guidance, see Compatible SpO2 Sensors for Multi-Brand Monitors and Understanding SpO2 Sensor Types.
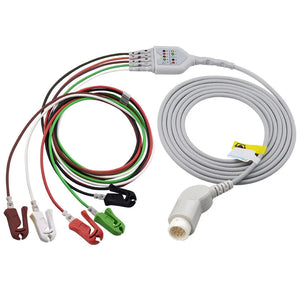
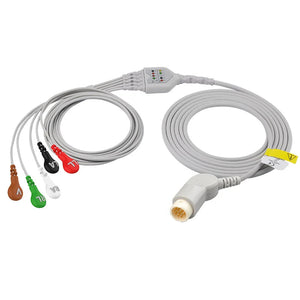
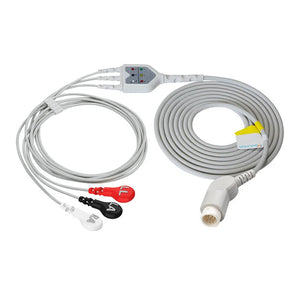
ECG Shows No Waveform or "Leads Off"
When the ECG waveform disappears entirely—or the monitor displays "Leads Off" or "No Signal Received"—the monitor has lost electrical contact with one or more ECG electrodes. This is arguably the most common alarm in continuous monitoring settings, and a leading contributor to alarm fatigue.
| Step | What to Check | Solution |
|---|---|---|
| 1 | Are ECG electrodes still attached to the patient? | Visually confirm each electrode. Look for peeling edges—sweat, oil, and body movement loosen adhesion over time. |
| 2 | Are ECG lead wires snapped onto the electrodes? | Check every snap/clip connection. A weak spring in a leadwire clip is a frequent hidden culprit. |
| 3 | Are the electrodes expired or dried out? | Electrode gel has a shelf life. Replace disposable ECG electrodes every 24 hours (every 8h for neonates). |
| 4 | Was the skin properly prepared? | Clean with alcohol prep pads, clip hair (don't shave), and allow skin to dry. Proper prep reduces impedance by up to 90%. |
| 5 | Is the lead mode setting correct? | Common mistake: monitor set to 5-lead ECG mode but only 3 electrodes connected. Match mode to cable configuration. |
| 6 | Is the ECG trunk cable damaged? | Inspect for visible cracks, kinks, or corroded pins. Swap with a known-good cable to test. |
Per industry standard YY/T 0196-2005, ECG electrodes must maintain AC impedance below 2 kΩ for reliable signal transmission. MedLinket disposable ECG electrodes achieve a tested impedance of just 109 Ω—well below the 2 kΩ threshold—ensuring strong signal quality even in challenging skin conditions. Once gel dries out, impedance rises sharply and the monitor interprets this as a lost connection.
For a complete step-by-step walkthrough of resolving ECG alarms, see our dedicated ECG Leads Off Alarm Fix Guide. For placement-related issues, see Common ECG Lead Placement Mistakes.
NIBP Shows No Reading or "Measurement Failed"
NIBP (Non-Invasive Blood Pressure) measurement failures are frustrating because the monitor actively inflates and deflates the cuff during each cycle. A "Measurement Failed" or blank result means the oscillometric algorithm could not identify a valid pressure signal.
| Step | What to Check | Solution |
|---|---|---|
| 1 | Is the blood pressure cuff the correct size? | Bladder should cover ~80% of arm circumference. Wrong size = failed reading or falsely high/low values. Sizing guide → |
| 2 | Is the cuff positioned correctly? | Artery marker (△) over the brachial artery. Cuff on bare skin—not over clothing thicker than 2 mm. |
| 3 | Is the NIBP hose kinked or disconnected? | Inspect the entire length. Kinked hoses are one of the most common culprits. |
| 4 | Is the cuff leaking air? | Listen for hissing during inflation. Worn cuffs and hose-to-cuff connections are common leak points. |
| 5 | Was the patient moving during measurement? | Patient movement, tremors, or shivering invalidate oscillometric readings. Retry when still. |
| 6 | Does the patient have an irregular rhythm? | Arrhythmias (especially AFib) make automated NIBP unreliable. Consider manual BP measurement. |
The single most impactful action for reducing NIBP failures is choosing the correct NIBP cuff size. For step-by-step technique, see How to Put On a Blood Pressure Cuff. For persistent blood pressure alarm issues, see the dedicated Blood Pressure Alarm Troubleshooting guide.
Temperature Shows No Reading
Temperature monitoring failures are typically straightforward—the signal chain is simpler than other parameters.
| Step | What to Check | Solution |
|---|---|---|
| 1 | Is the temperature probe connected? | Reseat the connector. Temp probe connectors loosen easily during patient repositioning. |
| 2 | Is the probe in contact with the patient? | Skin surface probes need firm, complete contact. Insulate with tape to reduce ambient interference. |
| 3 | Is the probe compatible with the monitor? | Temperature connectors vary by brand and are not interchangeable. Verify compatibility. |
| 4 | Is the probe or cable damaged? | Temp probes contain fragile thermistor wires. If sharply bent or crimped, replace. |
For critical settings like general anesthesia or neonatal care, core temperature probes (esophageal, rectal, or bladder) are preferred over peripheral sites. MedLinket offers reusable temperature probes, disposable skin surface probes, and infant incubator/warmer probes compatible with Philips, GE, Mindray, and Dräger monitors.
EtCO2 Shows No Reading
EtCO2 (end-tidal CO2) no-reading issues are less common but can be clinically critical—particularly for intubated patients where EtCO2 confirms endotracheal tube placement.
| Step | What to Check | Solution |
|---|---|---|
| 1 | Is the EtCO2 sampling line connected? | Check the nasal cannula or airway adapter connection AND the sampling line-to-module connection. |
| 2 | Is the sampling line kinked or blocked? | Moisture, secretions, or a kinked line block gas flow. Replace the sampling line. |
| 3 | Is the water trap full or clogged? | Water traps capture moisture from exhaled gas. Replace when visibly saturated. |
| 4 | Is the patient actually exhaling CO2? | For intubated patients, absent EtCO2 after confirmed connection could indicate esophageal intubation or cardiac arrest. Assess patient immediately. |
| 5 | Is the EtCO2 module warming up? | Sidestream EtCO2 modules require a warm-up period (typically 30–120 seconds) after power-on. |

When to Replace Accessories vs. Call Biomed
Knowing the boundary between "bedside fix" and "Biomed ticket" saves time and prevents both unnecessary service calls and dangerous DIY repairs. For a comprehensive decision framework, see When to Call Biomed vs. Troubleshoot Yourself.
You Can Fix It at the Bedside
| Issue | Action |
|---|---|
| Loose or displaced sensor/electrode | Reattach or replace |
| Expired or dried-out electrodes | Apply fresh electrodes |
| Wrong lead mode selected | Adjust monitor settings |
| Kinked NIBP hose | Straighten or replace hose |
| Poor skin preparation | Clean, abrade, and re-prep skin |
| Cold extremities (SpO2) | Warm patient, switch sensor site |
| Clogged EtCO2 water trap | Replace water trap |
Call Biomed Immediately
| Issue | Why It Needs Biomed |
|---|---|
| No reading persists after replacing ALL accessories | Internal module or board failure |
| Monitor displays error codes or "module communication failure" | Hardware/firmware issue |
| Multiple parameters fail simultaneously | Main board, power supply, or systemic issue |
| Visible damage to the monitor (cracked screen, burned smell) | Safety hazard—do not use. See Display Problems Guide |
| Recurring no-reading on same parameter despite new accessories | Port or module degradation |
| Monitor won't power on at all | Power supply failure. See Monitor Not Turning On |
Prevention: Reducing No-Reading Events Before They Happen
The best troubleshooting session is the one you never need. These preventive practices dramatically reduce the frequency of no-reading events:
1. Stock quality-verified, compatible accessories. Incompatible medical cables and medical sensors are a hidden cause of signal failure. Every cable and sensor must match your monitor's brand, connector type, and signal protocol. Not sure what your monitor needs? See How to Identify Which Cables Your Monitor Needs.
2. Replace consumables on schedule. ECG electrodes should be changed every 24 hours (gel degrades). Disposable SpO2 sensors are single-use. Reusable sensors and cables should be inspected every shift. For a complete maintenance schedule, see the Accessory Replacement Schedule.
3. Maintain proper skin preparation. Cleaning the electrode site with an alcohol prep pad, allowing it to dry, and gently abrading the skin until slightly pink reduces impedance by up to 90%—ensuring consistent electrical contact. For proper placement technique, see the 12-Lead ECG Placement Guide.
4. Secure cables to reduce mechanical stress. Route cables away from bedrails and areas where patients can pull them. A loose cable under tension is an intermittent no-reading event waiting to happen.
5. Verify compatibility before opening new stock. When sourcing compatible accessories, work with a manufacturer that provides verified compatibility lists and technical support. A Nellcor-technology sensor plugged into a Masimo-technology module will display nothing—even if the connector physically fits.
Why Accessory Quality Matters: MedLinket's Approach
A failed sensor does not just create an alarm—it creates a clinical blind spot. The quality of your monitoring accessories directly affects how often clinicians encounter no-reading events. Low-quality cables with poor shielding are more susceptible to electrical interference. Electrodes with inconsistent gel formulations lose conductivity faster. Sensors with subpar optical components produce weaker signals that fail sooner.
💡 From MedLinket's Testing Lab
MedLinket ECG electrodes achieve AC impedance of 109 Ω (industry standard YY/T 0196-2005 requires ≤2 kΩ), DC offset of 4.11 mV (≤100 mV required), and internal noise of 49.5 μV (≤150 μV required). Our patented eccentric (offset) electrode design (Patent CN202120112524.5) absorbs cable tension away from the adhesive area—in controlled pull-force testing (1N every 5 seconds), standard concentric electrodes showed 2,000–7,000 μV drift with incomplete recovery, while MedLinket eccentric electrodes showed only ~1,000 μV drift with full recovery within 0.1 seconds. This translates directly to fewer "Leads Off" and no-reading events during continuous monitoring.
About MedLinket — Reliable Patient Monitor Accessories Since 2004
| 🏭 Founded | 2004 · Shenzhen, China (NEEQ: 833505) |
| 🏭 Manufacturing | 3 self-owned factories (Shenzhen, Shaoguan, Indonesia) · 3,500+ molds · 16,651+ SKUs |
| 📋 Certifications | ISO 13485 · FDA 510(k) (19 clearances) · CE (48 Class II) · NMPA · MDSAP |
| 🌍 Global Reach | 120+ countries · 2,000+ hospitals · 30+ compatible monitor brands |
| 🔬 Quality | 100% outgoing inspection · $5M product liability insurance · OEM partner to Philips, Mindray, and others |
| 🔗 Compatibility | Philips, GE, Mindray, Dräger, Masimo, Nellcor, Nihon Kohden, and 23+ more |
Frequently Asked Questions
Q: Why does only one parameter show no reading while others work fine?
This almost always indicates an issue with that specific parameter's accessory chain—the sensor, cable, or electrode—rather than the monitor itself. Each parameter uses a separate module and accessory set. Replace the accessories for the affected parameter using the swap test, and if the problem persists, that specific module may need Biomed attention.
Q: How do I determine if the problem is the cable or the sensor?
Use the swap test. First, replace only the sensor with a known-good one. If the reading returns, the old sensor was faulty. If still no reading, swap the cable next. This isolate-and-replace approach is the standard diagnostic method used by clinical engineers worldwide.
Q: The SpO2 sensor light is flashing red, but I still get no reading. Why?
The emitter (red LED) is working, but the detector on the opposite side is not picking up a signal. This typically means poor perfusion at the sensor site, improper positioning (LED not aligned with the detector), or a damaged detector. Reposition the sensor, warm the digit, or try a different site such as the earlobe. For detailed sensor technology guidance, see Understanding SpO2 Sensors.
Q: Can using non-OEM compatible accessories cause "no reading" problems?
Yes—but only if they are not properly matched. The issue is not OEM vs. compatible; it is whether the accessory matches your monitor's connector type and signal technology. Certified compatible accessories from manufacturers like MedLinket (FDA cleared, CE marked, ISO 13485) are verified to match both the physical and electronic specifications of the original.
Q: Should I restart the monitor if troubleshooting does not work?
Restarting a single parameter module (if your monitor supports it) is reasonable after checking all accessories. A full monitor reboot should be a last resort and requires briefly disconnecting monitoring—have an alternative monitoring plan ready and follow your facility's protocol. If the monitor has broader issues like a blank or flickering display, see our display troubleshooting guide.
Need Compatible Replacement Accessories for Your Monitors?
MedLinket offers full-range SpO2 sensors, ECG cables, NIBP cuffs, temperature probes, and EtCO2 accessories—all 100% QC tested and compatible with 30+ monitor brands. FDA cleared. CE marked. ISO 13485 certified.
Browse SpO2 Sensors →Browse ECG Cables →
Free compatibility verification: shopify@medlinket.com · WhatsApp: +852 6467 3105
📚 Continue Reading: Hospital Monitor Reading & Accessories Guide
A. Parameter Basics:
What is SpO2? · Normal Heart Rate · ECG Numbers Explained · NIBP Readings · What is EtCO2?
B. Alarm Troubleshooting:
ECG Leads Off Alarm · Blood Pressure Alarm · False Alarm Prevention
C. Equipment Troubleshooting:
Monitor Shows No Reading (You are here) · Display Problems · Monitor Not Turning On · When to Call Biomed
D. Accessories:
Accessories by Parameter · Identify Your Cables · OEM vs. Compatible · Replacement Schedule