A hospital monitor displays six core vital signs: SpO₂ (95–100%), heart rate (60–100 bpm), ECG (rhythm waveform), NIBP (~120/80 mmHg, MAP ≥65), EtCO₂ (35–45 mmHg), and temperature (97–99 °F). Numbers are on the right; waveforms run along the left. 85–99% of monitor alarms are false — most can be silenced in under 60 seconds by checking the sensor first, the patient second, and the monitor last.
⚡ Quick Answer
A hospital patient monitor tracks vital signs including SpO2 (oxygen saturation, normal 95–100%), heart rate (normal 60–100 BPM for adults), ECG (heart rhythm), NIBP (blood pressure, normal ~120/80 mmHg), EtCO2 (end-tidal CO2, normal 35–45 mmHg), and temperature. Each parameter requires specific patient monitor accessories — sensors, cables, cuffs, and probes — to generate accurate readings. Critical insight: 85–99% of hospital monitor alarms are false or non-actionable — this guide shows you how to tell the difference, troubleshoot fast, and choose accessories that reduce false alarms at the source.
Whether you are a new nurse walking into an ICU for the first time, a respiratory therapist interpreting ventilator-patient interactions, an EMT responding to a field emergency, or a Biomedical Equipment Technician (BMET) maintaining a fleet of monitors — understanding what the numbers on a patient monitor mean (and what to do when they alarm) is foundational to patient safety.
This pillar guide pulls together everything we've learned across two decades of building medical sensors and monitoring accessories at MedLinket, plus thousands of conversations with the nurses, RTs, and biomeds who actually use this equipment at the bedside. Each section gives you the working knowledge to make decisions in real time — and links out to a full deep-dive article when you need more depth.
📑 Pillar Guide Map — 4 Parts, 20 In-Depth Articles
Click any card to jump to that section
Understanding Vital Sign Parameters
Six core parameters every clinician must read confidently — SpO₂, HR, ECG, NIBP, EtCO₂, and temperature.
- What is a normal SpO₂ level?
- How to read ECG & NIBP numbers
- Why EtCO₂ matters in resuscitation
- Core vs. peripheral temperature
Hospital Monitor Alarms — What They Mean
85–99% of alarms are false. Learn to triage red vs. yellow alarms and resolve common alarms in under 60 seconds.
- Alarm priority levels (red, yellow, blue)
- SpO₂ low alarm response
- ECG leads-off troubleshooting
- Reducing alarm fatigue
Equipment Troubleshooting
Systematic diagnostics for "no reading," frozen displays, power failures, and when to escalate to BMET.
- What to check when monitor shows no reading
- Blank, flickering, or frozen display
- Patient monitor won't power on
- Clinical staff fix vs. BMET call
Patient Monitor Accessories — Complete Guide
Choose right. Replace proactively. Reduce false alarms at the source — sensors, cables, cuffs, probes.
- Accessories by parameter type
- How to identify cable compatibility
- OEM vs. compatible — what to know
- Replacement schedule for every accessory
📑 Detailed Article Index
Part A: Understanding Vital Sign Parameters
Part B: Hospital Monitor Alarms — What They Mean
Part C: Equipment Troubleshooting
Part D: Patient Monitor Accessories Guide
Why healthcare facilities trust MedLinket · Frequently Asked Questions
A modern patient monitor displays multiple vital signs simultaneously, but the screen layout is more consistent across brands than most new staff realize. Numbers run down the right side; waveforms scroll along the left. Color coding follows IEC 60601-1-8 in most ICU-grade units — green for ECG/HR, cyan for SpO₂, yellow for RR or EtCO₂, red for invasive arterial pressure or critical alarms, white for temperature. Once you internalize that geography, reading a Philips, GE, or Mindray monitor is essentially the same skill.
The table below is the cheat sheet I keep in my head when scanning a bedside. If you remember nothing else from this section, remember this:
| Parameter | Display Label | Normal Adult Range | Accessory Required |
|---|---|---|---|
| 🫁 SpO2 | SpO2 (blue/cyan) | 95–100% | SpO2 sensor + cable |
| ❤️ Heart Rate | HR or PR (green) | 60–100 BPM | ECG cables or SpO2 sensor |
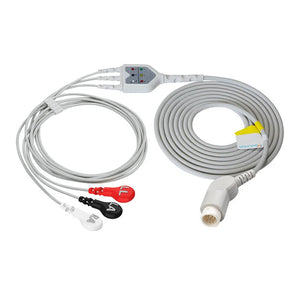
| 📈 ECG | ECG waveform (green) | Normal sinus rhythm | ECG trunk cable + leadwires + electrodes |
| 🩺 NIBP | SBP/DBP (MAP) (red/white) | ~120/80 (93) mmHg | NIBP cuff + hose |
| 💨 EtCO2 | EtCO2 (yellow/white) | 35–45 mmHg | EtCO2 sampling line / sensor + water trap |
| 🌡️ Temperature | TEMP (yellow/white) | 36.5–37.5 °C (97.7–99.5 °F) | Temperature probe + cable |
1. What is SpO2 and what's a normal SpO2 level?
SpO2 (peripheral capillary oxygen saturation) tells you what percentage of hemoglobin in arterial blood is carrying oxygen. It's measured non-invasively by a pulse oximeter sensor that uses two precise wavelengths — 660 nm red and 940 nm infrared. Oxygenated hemoglobin absorbs more infrared, deoxygenated hemoglobin absorbs more red, and the ratio between the two yields SpO₂.
A normal SpO2 level is 95–100% for healthy adults. COPD patients may have a target of 88–92% per physician orders — going higher in chronic CO₂ retainers can suppress hypoxic respiratory drive, which is one of those counterintuitive teaching points new respiratory therapists have to internalize. Readings below 90% generally require immediate clinical intervention; below 85% is a medical emergency. In neonates, SpO₂ rises gradually after birth, starting as low as 60% in the first minutes of life before stabilizing above 90%.

SpO₂ has known limitations that catch new clinicians off guard. It does not measure ventilation (CO₂ levels), it can't detect carbon monoxide poisoning on a standard two-wavelength oximeter, and readings degrade with poor perfusion, motion artifact, nail polish, ambient light, and skin pigmentation. Always correlate the number with the pleth waveform. A strong, regular waveform confirms a reliable reading; a flat or chaotic waveform usually means a sensor problem rather than true hypoxemia. Hospitals typically use direct-connect SpO2 sensors for continuous bedside monitoring, or disposable SpO2 sensors in infection-sensitive environments. For spot checks on the floor, a handheld finger pulse oximeter is hard to beat for portability.
📖 Deep Dive Articles — SpO2
Replacing a Worn SpO2 Sensor?
Top-3 most ordered SpO2 products by hospitals worldwide
2. What is a normal heart rate on a hospital monitor?
Heart rate (HR) is usually the most prominently displayed number on a hospital monitor — green text, top right, labeled "HR" or "PR." HR is derived from the ECG by measuring the interval between R-waves (the tallest peak of the QRS complex). PR (pulse rate) comes from the SpO₂ sensor and reflects the mechanical pulse. In healthy patients HR and PR should be nearly identical; a meaningful gap between them is a red flag for an arrhythmia, pulse deficit, or perfusion problem — it's one of the things I always check during morning rounds before walking into a room.
Normal resting HR is 60–100 BPM for adults. Conditioned athletes commonly run 40–60 BPM at rest, which is physiologic, not bradycardia. Infants have much higher normal ranges (100–160 BPM), and elderly patients tend lower. Rates above 100 (tachycardia) or below 60 (bradycardia) trigger alarms — but as we'll cover in Part B, the alarm threshold matters less than the patient's clinical picture and trend. For ambulatory rhythm monitoring, Holter ECG cables support continuous 24–48 hour recording outside the hospital setting.
📖 Deep Dive Article — Heart Rate
3. What do ECG numbers and waveforms mean on a hospital monitor?
The ECG (electrocardiogram) display is the most information-dense parameter on the screen. It traces the heart's electrical activity as a continuous waveform — P wave (atrial depolarization), QRS complex (ventricular depolarization), T wave (ventricular repolarization). Beyond raw heart rate, the ECG reveals ST-segment changes (suggesting ischemia or infarction), arrhythmias (atrial fibrillation, PVCs, ventricular tachycardia), and conduction abnormalities like AV blocks and bundle branch blocks.
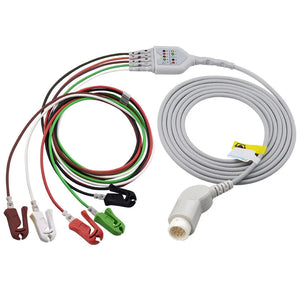
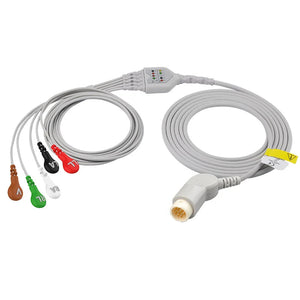
Lead configuration matters enormously. A 3-lead ECG gives basic rhythm monitoring. A 5-lead ECG adds better arrhythmia detection and limited ST monitoring. A 12-lead ECG delivers full diagnostic capability for ischemia and chamber abnormalities. Your choice of ECG cables and leadwires has to match both the lead configuration you need and the specific monitor brand and model. Facilities using an ECG trunk cable with separate replaceable leadwires gain real flexibility — when one leadwire fails, you replace just that wire instead of the entire cable assembly. For diagnostic EKG machines, dedicated direct-connect ECG cables are typically required.
Signal quality lives or dies on electrode contact. Dried-out gel, oily skin, chest hair, or a snap connector that's loose by half a millimeter all produce artifact that degrades the waveform and triggers false alarms. This is the single biggest source of alarm fatigue on telemetry units, and it's almost entirely preventable.
Good signal: clear P–QRS–T sequence, stable baseline, consistent QRS amplitude. Bad signal: wandering baseline (poor electrode contact), spiky 60 Hz interference (electrical noise), or a single flatline lead (electrode detached). When in doubt — replace the electrode first. Filters mask problems; they don't solve them.
📖 Deep Dive Articles — ECG
Reduce ECG Artifact at the Source
Quality cables + fresh electrodes = fewer false alarms
4. How do you read NIBP: systolic, diastolic, and MAP?
NIBP (Non-Invasive Blood Pressure) is displayed as three numbers: systolic/diastolic (MAP). For example, 120/80 (93). Systolic pressure reflects cardiac contraction force, diastolic reflects resting pressure between beats, and MAP — Mean Arterial Pressure — represents the average pressure driving blood through the organs throughout the cardiac cycle. The formula: MAP = (SBP + 2×DBP) / 3.
MAP is arguably the most clinically important of the three numbers. A MAP below 65 mmHg indicates inadequate organ perfusion and is the standard threshold in adult sepsis management — when sepsis bundles drive vasopressor titration, that's the target. Normal adult BP is around 120/80 mmHg with a MAP of 70–100 mmHg. The American Heart Association classifies BP into Normal (<120/<80), Elevated (120–129/<80), Hypertension Stage 1 (130–139/80–89), Stage 2 (≥140/≥90), and Hypertensive Crisis (>180/>120).
NIBP measurement uses the oscillometric method: a blood pressure cuff inflates to occlude the brachial artery, then deflates gradually while the monitor detects oscillations in cuff pressure. Maximum oscillation amplitude corresponds to MAP, from which systolic and diastolic are calculated. Accuracy depends overwhelmingly on correct cuff size — the single most common source of NIBP measurement error in our experience. A cuff that's too small overestimates BP (often by 10–20 mmHg), one that's too large underestimates it. Hospitals stock both reusable NIBP cuffs for general wards and adult disposable NIBP cuffs for isolation or single-patient use. In neonatal units, properly sized neonatal disposable NIBP cuffs are mandatory — adult cuffs on small patients give meaningless readings. The cuff connects to the monitor via an NIBP hose, and a secure NIBP connector ensures an airtight seal across the inflation cycle. For patients tracking BP at home, a home blood pressure monitor bridges the gap between hospital visits.
📖 Deep Dive Articles — NIBP
Correct Cuff Size = Accurate Readings
The #1 source of NIBP error is fixable — choose the right cuff
Not sure which accessory fits your monitor?
Send us a photo of your monitor's connector — our engineering team will identify the exact compatible part within 30 minutes. Free, no obligation.
5. What is EtCO2 and why is end-tidal CO2 monitored?
EtCO2 (end-tidal CO₂) measures CO₂ concentration at the end of each exhalation — a direct readout of ventilation status, metabolic activity, and, indirectly, cardiac output. Normal EtCO₂ is 35–45 mmHg. Below 35 suggests hyperventilation or a sampling leak; above 45 suggests hypoventilation, airway obstruction, or hypermetabolic state.
EtCO₂ monitoring has moved from "nice to have" to "standard of care" across acute care. The American Society of Anesthesiologists has required EtCO₂ for all anesthetized patients since 1998. It's the gold standard for confirming endotracheal tube placement (immediate, definitive — beats listening for breath sounds), and during CPR a sudden EtCO₂ rise above 40 mmHg is one of the strongest indicators of return of spontaneous circulation (ROSC). I trust EtCO₂ over SpO₂ during a code because there's no pulsatile flow during compressions, which makes pulse oximetry essentially useless.
Two measurement approaches: mainstream (sensor sits directly on the airway circuit — real-time, but only for intubated patients, using a dedicated mainstream EtCO2 sensor) and sidestream (gas is sampled via a thin tube to a remote sensor — works with non-intubated patients on nasal cannula but introduces 2–5 seconds of delay). Sidestream systems require sampling lines and water traps that need scheduled replacement to prevent moisture from reaching the optical bench. Both setups connect to the monitor through an EtCO2 adapter cable specific to your monitor brand.
📖 Deep Dive Article — EtCO2
EtCO2 Consumables — Ready to Ship
Sampling lines & water traps for major brands
6. What's the difference between core and peripheral temperature monitoring?
Hospital monitors display temperature in two fundamental categories: core (esophageal, rectal, bladder, pulmonary artery) and peripheral (axillary, skin surface, tympanic). Core reflects the body's true internal temperature. Peripheral is easier to obtain but typically reads 0.5–1 °C lower than core and is heavily influenced by ambient conditions.

Core temperature monitoring is critical during general anesthesia (where perioperative hypothermia drives surgical site infections, cardiac events, coagulopathy, and prolonged recovery), therapeutic hypothermia protocols post-cardiac arrest, and trauma resuscitation where the lethal triad of hypothermia, acidosis, and coagulopathy can spiral fast. The esophageal site is considered the gold standard in anesthesia because it tracks pulmonary artery temperature within roughly 0.1 °C. To prevent perioperative hypothermia, most U.S. operating rooms now use disposable warming blankets (forced-air warming systems) to maintain normothermia throughout the case.
Choosing the right temperature probe — reusable vs. disposable, and the right site (skin / esophageal / rectal / bladder) — depends on the clinical scenario, patient population, and institutional protocol. A temperature adapter cable is usually needed to connect the probe to a specific monitor brand. For neonatal applications, specialized infant incubator/warmer temperature probes are required — adult probes on neonates are both inaccurate and unsafe.
📖 Deep Dive Article — Temperature
Temperature Monitoring Essentials
From esophageal probes to OR warming blankets
Alarms exist to protect patients, but the data is uncomfortable: 85–99% of hospital monitor alarms are false or clinically insignificant. That creates a paradox where the safety net itself becomes a hazard — clinicians get desensitized, real critical events get missed, and a 2019 FDA report identified cardiac monitor alarms as the leading cause of alarm-related patient deaths. The Joint Commission has had alarm management on the National Patient Safety Goals list since 2014.
The answer isn't to silence alarms. It's to understand them, eliminate preventable false triggers, and respond systematically: assess the patient first, the equipment second, and the monitor last. That order matters every single time.
7. What are the alarm priority levels on a hospital monitor?
| Priority | Color | Sound | Meaning | Response Time |
|---|---|---|---|---|
| Critical | 🔴 Red | Continuous tone | Life-threatening condition | Immediate |
| Warning | 🟡 Yellow | Intermittent beeps | Needs prompt attention | < 5 minutes |
| Advisory | 🔵 Blue / White | Single beep | Technical / equipment issue | When available |
📖 Deep Dive Article — All Alarms
8. How do you respond to a SpO2 low alarm?
SpO₂ low alarms are among the most common — and most commonly false — alarms in any hospital. The response algorithm is straightforward and takes under a minute when you do it in the right order:
Step 1: Look at the patient. Cyanosis (blue lips, fingertips), increased work of breathing, altered mental status — these are real hypoxemia. A pink, talking, comfortable patient with "SpO₂ 85%" on the screen is almost certainly an artifact problem.
Step 2: Check the pleth waveform. A clean, regular waveform with a low number = real hypoxemia. A flat, chaotic, or absent waveform = sensor problem.
Step 3: Check the SpO₂ sensor. Properly positioned? Cold fingers? Nail polish? Sensor damaged or older than 12 months?
The most common false-alarm cause is poor sensor placement — repositioning the sensor, warming cold extremities, or switching to a different site (ear clip, forehead) resolves most false triggers. If the patient is genuinely hypoxic, administer supplemental oxygen and escalate immediately. MedLinket's reusable SpO2 sensors are designed with optimized LED alignment and secure clip mechanisms to minimize motion artifact and improve signal stability. When transitioning between reusable and disposable sensors, make sure you have the correct SpO2 adapter cable for your monitor — connector types vary between brands. For quick bedside swaps, short SpO2 sensors (no long integrated cable) plug straight into the adapter cable already on the monitor.
📖 Deep Dive Article — SpO2 Alarms
⚡ Fast Sensor Swap
Nellcor-Compatible Short SpO2 Sensor (Multi-Site Y)
Short-cable Y-type sensor for adult/pediatric/neonate. Plug into your existing adapter cable — 10-second bedside replacement.
9. When should you worry about a heart rate alarm (high or low)?
Heart rate alarms trigger when the rate breaches set thresholds. High HR (tachycardia) can mean pain, fever, anxiety, dehydration, hemorrhage, or arrhythmia — five very different clinical situations that require different responses. Low HR (bradycardia) may be normal in athletes or during sleep, or may indicate heart block, beta-blocker effect, or vagal response. Context drives the call.
Escalate when you see: sustained HR > 150 BPM, HR < 40 BPM with symptoms, any tachycardia accompanied by chest pain or hemodynamic instability, or a new irregular rhythm pattern that wasn't there an hour ago. False HR alarms are usually caused by loose ECG electrodes, electrical interference, motion artifact, or — surprisingly common — the monitor's algorithm double-counting tall T waves as additional QRS complexes, which produces a phantom doubled rate.
📖 Deep Dive Article — Heart Rate Alarms
10. How do you troubleshoot a blood pressure alarm?
BP alarms fire for readings outside set limits or for measurement failures. BP high with SBP > 180 or DBP > 120 is hypertensive urgency requiring immediate assessment. BP low with MAP < 65 mmHg suggests inadequate perfusion and possible shock — that's a rapid response trigger in most facilities.
"Measurement failed" is the most frustrating NIBP alarm and almost always equipment-related: wrong cuff size, patient movement, arrhythmia interfering with the oscillometric algorithm, cuff placed over clothing, kinked hose, or air leak. Systematic troubleshooting starting with cuff size verification resolves most failures. In critically ill patients where beat-to-beat BP data is essential, clinicians switch to invasive BP monitoring using a disposable IBP transducer connected via an IBP cable to the monitor. Pressure infusion bags alongside the IBP setup maintain a constant flush through the arterial line.
📖 Deep Dive Article — Blood Pressure Alarms
🩸 Switching to IBP?
Disposable IBP Transducer (Edwards 5-Pin Connector)
Beat-to-beat continuous BP monitoring for ICU and OR. Pair with Edwards-compatible IBP cable & pressure infusion bag for complete arterial line setup.
11. How do I fix an ECG "leads off" alarm on a hospital monitor?
"Leads Off" is one of the highest-frequency alarms in any monitored unit — and importantly, it doesn't necessarily mean an electrode physically fell off. The electrical connection can be lost while the electrode looks visually attached: dried gel, oily or diaphoretic skin, or a leadwire snap that's not fully engaged. I've seen "leads off" alarms on patients whose electrodes looked perfect to the eye, where the only fix was a fresh electrode.

The fix is mechanical and fast: (1) verify all electrodes are physically attached, (2) check leadwire-to-electrode snap connections, (3) assess electrode quality (gel condition, edge lifting), (4) check skin prep, (5) replace electrodes if degraded — fresh ones every 24 hours, no exceptions, (6) confirm the trunk cable connection at the monitor end. Most monitors indicate which specific lead is off (RA, LA, LL, RL, V/C), so you can target the right electrode immediately instead of pulling everything off.
Prevention is everything here. Good skin prep (clean, dry, hair-free where possible), fresh electrodes changed every 24 hours, quality ECG cables and leadwires with secure connections, and proper cable routing that doesn't put tension on individual leads. MedLinket's disposable ECG electrodes — including our patented off-center (eccentric) snap design — are engineered specifically to reduce baseline drift and lead detachment caused by clothing friction and patient movement, which generates up to 99.4% of false alarm events in some published studies.
📖 Deep Dive Article — Leads Off
⚡ Prevent Leads-Off Alarms
Stock Up: Disposable ECG Electrodes (Adult)
Fresh electrodes every 24 hours is the single most effective prevention strategy. Wet-gel adhesive, 4mm snap — universally compatible.
🔌 Replace Broken Leadwires
Mindray-Compatible 5-Lead Leadwires (AHA)
Molded grabber end for reliable snap connection. 36" length. Replace individual wires instead of the whole cable assembly.
12. How can you reduce false alarms and alarm fatigue?
Alarm fatigue is a recognized patient safety crisis. When 85–99% of alarms are non-actionable, clinicians become desensitized — and the inevitable consequence is delayed response to the small fraction that are real. The Joint Commission's National Patient Safety Goal NPSG.06.01.01 specifically targets clinical alarm safety as a result.
The root causes of false alarms cluster into three categories, and addressing all three simultaneously is what actually moves the needle. Sensor and electrode issues (poor placement, dried gel, motion artifact) are the largest single bucket and the most fixable through staff education and accessory hygiene. Alarm limit settings matter almost as much — default factory thresholds aren't right for individual patients, and patient-specific customization (widening limits for a chronically tachycardic patient, narrowing for a fragile post-CABG patient) dramatically reduces non-actionable alarms. Accessory quality rounds out the trio: degraded cables, worn connectors, and incompatible third-party sensors all generate noise. High-quality, well-maintained patient monitor accessories — replaced on schedule, not on failure — produce measurably fewer false triggers.
📖 Deep Dive Article — False Alarms
When a patient monitor isn't working as expected, the cause is usually straightforward and fixable at the bedside. The trick is to start with the simplest explanation — a disconnected cable — before assuming hardware failure. Most "monitor problems" are actually accessory problems, and most accessory problems take less than two minutes to fix.
13. What do you do when the monitor shows no reading?
When a parameter displays "---" or nothing at all, work the chain systematically: (1) Is the sensor or electrode physically connected to the patient? (2) Is the cable connected to the monitor? (3) Is the parameter enabled in monitor settings? (4) Is the accessory compatible with this specific monitor? (5) Is the accessory itself functional and undamaged?

Each parameter has its own typical failure modes. SpO₂ "no reading" usually traces back to sensor placement or cable connection. ECG showing no waveform points to electrode or leadwire problems. NIBP "no reading" often indicates a cuff or hose issue. The universal escape hatch: if the problem persists after checking connections, swap in a known-good accessory of the same type. If the known-good accessory also fails, the issue is in the monitor's internal parameter module — that's a BMET call.
📖 Deep Dive Article — No Reading
14. How do you fix a blank, flickering, or frozen monitor display?
A blank screen can come from a brightness setting, power supply issue, or internal hardware fault. A flickering display usually means a loose video cable, failing backlight, or electrical interference. A frozen display (waveforms and numbers stop updating) typically points to a software issue resolved by a power cycle.
Before paging biomed, run the basics: power cord seated firmly? Brightness turned up? Can you hear the monitor running (fans, alarm tones) even with a dark screen? If the monitor is clearly running but the display is dead, the LCD or display board needs replacement — which is a BMET job, not a bedside fix.
📖 Deep Dive Article — Display Problems
15. What should you check when a patient monitor won't turn on?
When a monitor won't power on, work the power chain top to bottom: wall outlet → power cord → monitor power supply → internal battery. Verify the outlet is live (plug in something else you trust). Inspect the cord for visible damage. If the monitor was running on battery, the battery may simply be depleted — connect to wall power, wait 5 minutes, and try again. Some units have an external fuse that can blow on a power surge. If everything external checks out and the monitor still won't start, it needs BMET service.
📖 Deep Dive Article — Won't Turn On
16. When should you call biomed vs. troubleshoot yourself?
Clinical staff can — and should — handle the common stuff: replacing electrodes and sensors, reconnecting cables, adjusting alarm limits, basic power checks, restarting a frozen monitor. These cover the vast majority of bedside problems and resolve them within minutes.
Call BMET when the monitor won't power on after basic checks, the display is malfunctioning, a known-good accessory doesn't work, you suspect an internal module failure, the monitor is producing consistently inaccurate readings across multiple accessories, or any time you observe physical damage (cracks, liquid ingress, burn marks). When you do call BMET, give them: the monitor brand, model, and serial number; the specific problem; what you've already tried; and how long the issue has been ongoing. That information cuts diagnostic time in half and gets the monitor back into service faster.
📖 Deep Dive Article — Biomed Decision
Every vital sign on a patient monitor depends on external accessories to function. SpO₂ sensors, ECG cables, ECG leadwires, ECG electrodes, NIBP cuffs, NIBP hoses, temperature probes, IBP transducers, and EtCO₂ sampling lines are all consumable or semi-consumable items that require regular replacement and brand-specific compatibility.
Accessory selection isn't an administrative formality — it directly drives measurement accuracy, alarm frequency, and patient safety. A degraded SpO₂ sensor generates false low readings. Dried-out ECG electrodes trigger leads-off alarms. A wrong-size NIBP cuff produces inaccurate BP. Quality accessories, properly maintained and replaced on schedule, are the single most underrated lever for reducing false alarms and unreliable readings.
17. What accessories does each monitor parameter need?
| Parameter | Accessories Needed | Typical Lifespan | Shop |
|---|---|---|---|
| 🫁 SpO2 | Reusable sensor, disposable sensor, extension/adapter cable | Reusable: ~12 months; Disposable: single-use; Cable: 2–3 years | SpO2 Products → |
| ❤️ ECG | Trunk cable, leadwires, disposable electrodes | Trunk cable: 2–3 years; Leadwires: 6–12 months; Electrodes: single-use (24h) | ECG Products → |
| 🩺 NIBP | Reusable or disposable cuff, hose, connector | Reusable cuff: ~2 years; Disposable cuff: single-patient; Hose: 1–2 years | NIBP Products → |
| 🌡️ Temperature | Reusable or disposable probe, adapter cable | Reusable probe: 1–2 years; Disposable probe: single-use | Temp Products → |
| 🩸 IBP | Disposable transducer, cable, pressure tubing | Transducer: single-use (≤96h per institutional policy); Cable: 2–3 years | IBP Products → |
| 💨 EtCO2 | Sampling line, water trap, adapter cable | Sampling line: 24–72h; Water trap: per manufacturer spec | EtCO2 Products → |
| 🧠 EEG/BIS | Disposable sensor, adapter cable | Sensor: single-use; Cable: 2–3 years | EEG Products → |
📖 Deep Dive Article — Accessories Overview
18. How do I identify which cables my monitor needs?
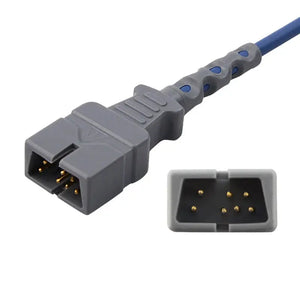
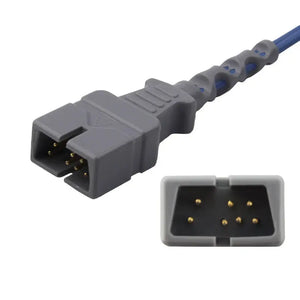
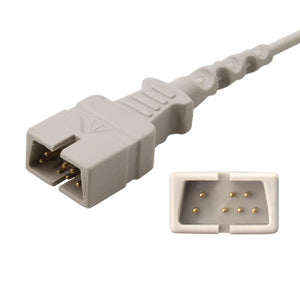
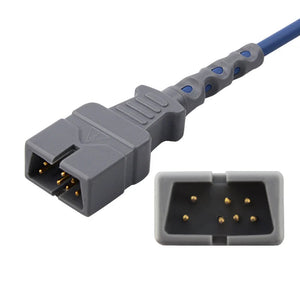
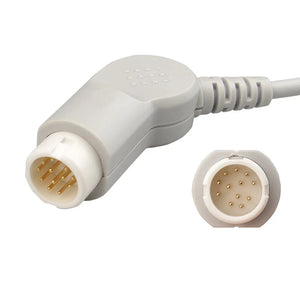
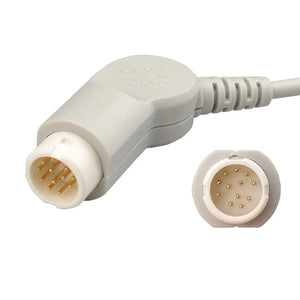
Identifying the right cable or sensor for your monitor takes three pieces of information: monitor brand and model, parameter type, and connector type. Different brands use proprietary connectors — a Philips SpO₂ sensor will not plug into a Mindray monitor without a specific adapter, and even within a single brand, generations of models often use different connectors. New BMETs run into this on day one.

The most reliable identification methods, in order: (1) check the monitor's user manual or service manual for OEM part numbers — that's always the gold standard, (2) inspect the existing cable's connector visually and match the geometry, (3) contact the accessory manufacturer with your monitor model for compatibility verification. MedLinket offers free compatibility verification — send your monitor model or a photo of your existing connector to shopify@medlinket.com or via WhatsApp, and our engineering team identifies the exact compatible product. We stock accessories for brands beyond the majors — including Comen, Biolight, Edan, and Medtronic — which matters for facilities running mixed fleets.
📖 Deep Dive Article — Cable Identification
19. Should I buy OEM or compatible patient monitor accessories?
When replacing patient monitor accessories, facilities choose between OEM (original equipment manufacturer) parts and compatible (third-party) alternatives. OEM accessories carry the monitor manufacturer's brand and guaranteed compatibility but at a significant price premium. Certified compatible accessories can deliver equivalent performance at substantially lower cost — provided they meet the right quality and regulatory bar.
The criteria that actually matter when evaluating compatible accessories: regulatory clearance (FDA 510(k), CE marking), quality system (ISO 13485 certification), connector compatibility (physical and signal protocol match), performance specifications (accuracy within OEM tolerances), and clinical validation (testing on the actual target monitor model, not just "compatible in theory").
In the United States, the Magnuson-Moss Warranty Act protects consumers' right to use compatible accessories without voiding the monitor's warranty, provided the compatible accessory does not cause the damage. That legal protection extends to hospitals and healthcare facilities. Many U.S. health systems we work with have moved to compatible accessories for high-volume disposables (electrodes, NIBP cuffs, SpO₂ sensors) while staying with OEM for high-stakes invasive items — that's a common, defensible procurement strategy.
📖 Deep Dive Article — OEM vs. Compatible
Shop Compatible Accessories by Brand
FDA 510(k) cleared · ISO 13485 manufactured · Up to 60% savings vs. OEM
20. How often should you replace patient monitor accessories?
Proactive replacement of monitoring accessories before failure prevents false alarms, measurement errors, and the inconvenience of unexpected failures during patient care. The table below covers general replacement guidelines — always follow your institution's specific policies and the manufacturer's recommendations.
| Accessory | Recommended Replacement Interval | Signs It Needs Replacing Sooner |
|---|---|---|
| Reusable SpO2 Sensor | Every 12–18 months | Erratic readings, cracked housing, frayed cable, weak or absent pleth waveform |
| ECG Trunk Cable | Every 2–3 years | Intermittent signal loss, visible wire damage, bent or corroded connector pins |
| ECG Leadwires | Every 6–12 months | Frequent "leads off" alarms, loose snap connectors, cracked insulation |
| ECG Electrodes | Every 24 hours (single-use) | Peeling edges, dried gel, poor signal quality |
| Reusable NIBP Cuff | Every 1–2 years | Bladder won't hold pressure, Velcro worn, stained beyond cleaning |
| NIBP Hose | Every 1–2 years | Cracking, air leak, connector looseness |
| Temperature Probe (reusable) | Every 1–2 years | Inaccurate readings vs. reference thermometer, discoloration, cracked insulation |
| EtCO2 Sampling Line | Every 24–72 hours | Moisture buildup, occluded line, elevated readings |
📖 Deep Dive Article — Replacement Schedule
Why Healthcare Facilities Around the World Trust MedLinket
This guide draws on more than two decades of manufacturing medical sensors, medical cables, and monitoring consumables for hospitals in over 120 countries. MedLinket (Shenzhen Med-Link Electronics Tech Co., Ltd) has specialized in life-signal acquisition since 2004 and was the first patient monitoring accessory company listed on China's NEEQ exchange (Stock Code: 833505).
MedLinket manufactures compatible accessories for all major monitor brands, including Philips, GE Healthcare, Mindray, Dräger, Masimo, Nellcor, Nihon Kohden, and more. With 3,500+ molds, 16,651+ product SKUs, and a fully vertically integrated manufacturing chain (R&D → mold production → wire extrusion → cleanroom assembly → testing → warehousing), we control quality from raw material to finished product. Beyond patient monitoring, our product range extends to veterinary monitoring supplies, ventilator accessories, and electrosurgery products including ESU cables and disposable grounding pads.
Certifications: ISO 13485:2016, ISO 9001:2015, MDSAP, FDA 510(k) (19 clearances), CE (48 Class II), NMPA, Brazil ANVISA, Australia TGA, Japan PMDA, and UK MHRA. Product liability insurance covers up to $5 million USD, with the ability to issue separate certificates listing distributors as additional insured parties.
Notable international clients include Royal Victoria Hospital (UK), Institut Hospitalier Jacques Cartier (France), and healthcare facilities across 14 countries with annual purchases exceeding $1 million each.
Need Help Finding the Right Accessories for Your Monitor?
Send us your monitor brand and model. Our engineering team verifies compatibility and recommends the exact products you need — free of charge.
📧 Email: shopify@medlinket.com💬 WhatsApp: +852 6467 3105
MOQ: As low as 1 piece for samples | Lead Time: 3–7 business days for stock items | Sample refundable on bulk order
Frequently Asked Questions
Q: What are the most important numbers on a hospital patient monitor?
A: The six core parameters are SpO₂ (oxygen saturation), heart rate, ECG (heart rhythm), NIBP (blood pressure), temperature, and respiratory rate. In higher-acuity settings, EtCO₂ and IBP (invasive blood pressure) become critical. None of them is most important in isolation — the clinical skill is reading them together against the patient's appearance and trend.
Q: Why does my patient's monitor keep alarming even though the patient looks fine?
A: The most common causes of false alarms are poor electrode/sensor placement, dried-out ECG electrode gel, patient movement, alarm limits set too tight for that specific patient, and degraded or damaged accessories. Start by checking sensor placement and electrode condition, then review whether alarm limits match the patient's baseline. Studies show 85–99% of monitor alarms are false or non-actionable — most fixes take under a minute. See our complete false alarm prevention guide.
Q: What is a dangerously low SpO2 level?
A: SpO₂ below 90% is generally considered dangerous and requires immediate medical evaluation. SpO₂ below 85% is a medical emergency. COPD patients have a different target (88–92% per physician orders) because higher saturations can suppress hypoxic respiratory drive. Always correlate the number with the pleth waveform and the patient's clinical appearance — a flat waveform with a low number usually means a sensor issue, not true hypoxemia. Full details in our SpO2 guide.
Q: What does MAP mean on a blood pressure reading and why does it matter?
A: MAP (Mean Arterial Pressure) represents the average pressure driving blood to your organs during the cardiac cycle. It is calculated as (SBP + 2×DBP) / 3. A MAP below 65 mmHg indicates inadequate organ perfusion and is the standard threshold in adult sepsis management — when sepsis bundles drive vasopressor titration, that's the target. Read the complete NIBP reading guide.
Q: How do I fix an "ECG leads off" alarm fast?
A: Check which specific lead is off (the monitor will tell you — RA, LA, LL, RL, V/C). Verify the electrode is physically attached and the leadwire snap is fully engaged. Inspect the electrode for dried gel or peeling edges — if degraded, replace it (electrodes should be changed every 24 hours regardless). Confirm the trunk cable is seated at the monitor end. Most leads-off alarms resolve in under 60 seconds with this sequence. Detailed walkthrough: ECG Leads Off Alarm: How to Fix.
Q: How often should I replace ECG electrodes?
A: Disposable ECG electrodes should be replaced every 24 hours, or sooner if signal quality degrades, edges peel, or the gel dries out. The conductive gel begins drying within 24–48 hours of skin contact, dramatically increasing impedance and triggering false alarms. In neonates, check more frequently due to sensitive skin. Never re-stick an electrode that has fallen off — use a fresh one. See the full replacement schedule.
Q: How do I know which accessories are compatible with my monitor?
A: You need three pieces of information: your monitor brand, exact model number, and the parameter (SpO₂, ECG, NIBP, etc.). Different brands — and often different model generations within a brand — use proprietary connectors. Check the user manual for OEM part numbers, inspect the existing connector geometry, or contact MedLinket at shopify@medlinket.com with your model for free compatibility verification. See our cable identification guide for the systematic approach.
Q: Will using compatible (non-OEM) accessories void my monitor's warranty?
A: In the United States, the Magnuson-Moss Warranty Act generally protects your right to use third-party compatible accessories without voiding the manufacturer's warranty, as long as the accessory does not cause the damage. MedLinket's accessories are FDA 510(k) cleared and CE marked, manufactured under ISO 13485 quality systems. Many U.S. health systems use compatible accessories for high-volume disposables while staying with OEM for invasive items. Learn more in our OEM vs. Compatible guide.
Q: What does a normal capnography (EtCO₂) waveform look like?
A: A normal capnogram has four phases: inspiratory baseline (Phase I, near zero), expiratory upstroke (Phase II), alveolar plateau (Phase III, the flat top at 35–45 mmHg), and inspiratory downstroke. The shape should look like a square-shouldered rectangle. A "shark-fin" pattern indicates bronchospasm or airway obstruction; a sudden drop toward zero suggests circuit disconnection, extubation, or cardiac arrest. See our EtCO₂ monitoring guide for waveform interpretation.
Q: When should I troubleshoot a monitor problem myself vs. call biomedical engineering?
A: Clinical staff should handle: replacing sensors, electrodes, and cuffs; reconnecting cables; adjusting alarm limits; basic power checks; restarting a frozen monitor. Call BMET for: power-on failures after basic checks, display malfunctions, internal module failures, consistent inaccurate readings across multiple known-good accessories, or any physical damage (cracks, liquid ingress, burn marks). When you call, give them the brand, model, serial number, specific problem, what you've already tried, and how long it's been happening. Our decision guide covers this in detail.
📚 Complete Article Index: Hospital Monitor Reading & Accessories Guide
This pillar page is part of MedLinket's Hospital Monitor Reading & Accessories content cluster. Below is the full index of all 20 in-depth articles in this series. Each article focuses on a specific topic and links back to this guide for broader context.
A. Understanding Vital Sign Parameters
- What is SpO2 and What is a Normal SpO2 Level?
- What is a Normal Heart Rate on a Hospital Monitor?
- What Do ECG Numbers Mean on a Hospital Monitor?
- Understanding NIBP Readings: Systolic, Diastolic, MAP
- What is EtCO2 and Why is It Monitored?
- Temperature Monitoring in Hospitals: Core vs. Peripheral
B. Monitor Alarms: Meanings and Responses
- Hospital Monitor Alarms: What Each Alarm Means
- SpO2 Low Alarm: Causes and Immediate Actions
- Heart Rate Alarm High/Low: When to Worry
- Blood Pressure Alarm: Troubleshooting Guide
- ECG Leads Off Alarm: How to Fix
- False Alarms on Patient Monitors: Prevention
C. Equipment Troubleshooting
- Patient Monitor Shows No Reading: Troubleshooting
- Monitor Display Problems: Blank, Flickering, Frozen
- Patient Monitor Not Turning On: What to Check
- When to Call Biomed vs. Troubleshoot Yourself
D. Patient Monitor Accessories
- Patient Monitor Accessories: Guide by Parameter Type
- How to Identify Which Cables Your Monitor Needs
- OEM vs. Compatible Accessories: What to Know
- Accessory Replacement Schedule: When to Change
About the Authors: This guide was written and clinically reviewed by the MedLinket Clinical Education Team — registered nurses, cardiac monitoring technicians, and Biomedical Equipment Technicians (BMETs) with combined decades of bedside experience on Philips, GE, Mindray, and Dräger platforms. The content combines published evidence-based clinical practice (AHA, ASA, AAMI, IEC standards) with two decades of medical sensor manufacturing experience at MedLinket (est. 2004, NEEQ: 833505). Last reviewed April 2026.
Disclaimer: This guide is intended for educational purposes and general clinical reference. It does not replace clinical training, institutional protocols, or the advice of qualified healthcare professionals. Always consult your facility's policies and the patient's attending physician for clinical decisions.